
- Level:
- Novice
- Lessons:
- 18 Lessons
Developing your Codex with Chat
Develop characters, locations, and other Codex entries with Novelcrafter Chat in real time.

- Reading Time
- approx. 3 min
When you’re brainstorming a story, good ideas can come from anywhere. You might come up with new characters, discover new locations, or develop lore you’ll want to add to your Codex.
You might be used to this process when working with Snippets or in the Plan interface (lesson 3), but what if you’re already talking with the AI? Let’s see how you can add and refine Codex entries right from a Chat.
In this lesson, we’ll cover using existing Codex entries as context in a Chat, and how to brainstorm, extract, and make new entries, all without leaving your conversation.
Developing an existing Codex entry
What if you have a protagonist, but your original notes only cover the basics? Chat can be a great partner for exploring their personality and background in more detail.
To give the AI the right information to work with, you can add context to your Chat session. If you remember from last session, there are two ways to do it:
Simply mention a character by name in your message to automatically add their Codex entry to the context.
Alternatively, manually add a Codex entry to the context, like a character’s hometown or a significant item, even if you don’t mention it by name in your prompt.
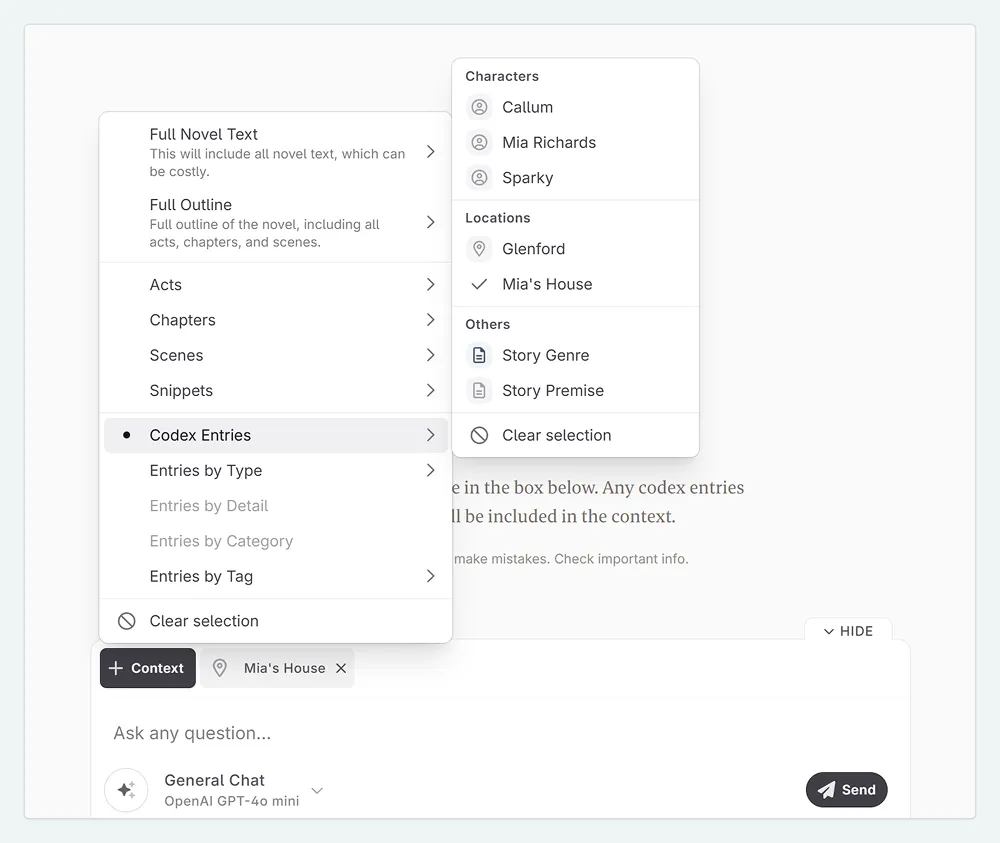
Once you provide that context, the AI will use your information as the foundation for its answers instead of making assumptions.
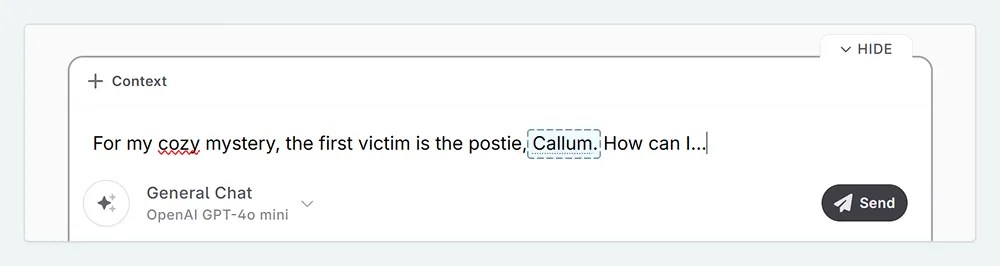
In my Cozy Mystery, I’ve created the protagonist Mia, but I haven’t included much detail yet. I’d like to develop her personality more, so I’ll add her Codex entry as context. I’m also manually adding her dog, Sparky, and the shop she runs, The Glenford Nook.
Then, in my message to the AI, I’ll ask:
I want to develop the character of Mia in my story. I know some basics about her, but I want to explore her on a deeper level. What kind of questions should I be asking? 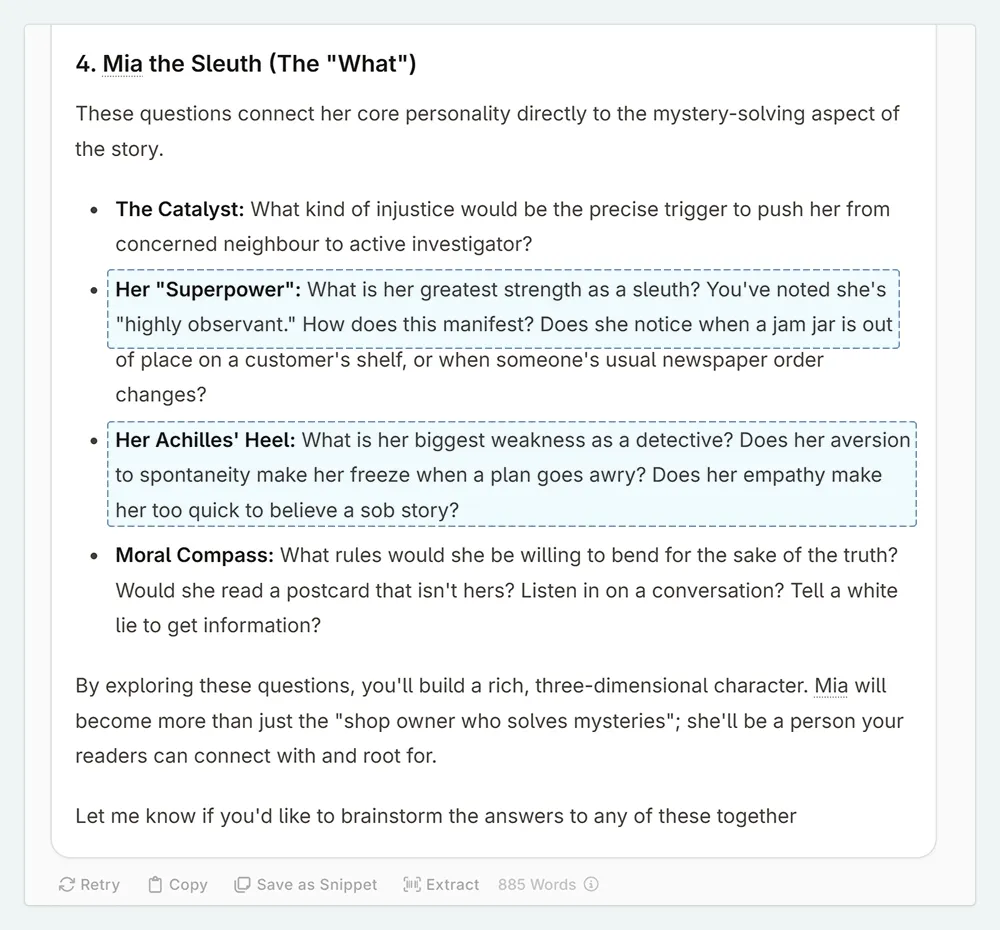
As you can see in the response, the AI has referenced parts of her existing Codex entry. This is great for keeping everything tied together.
Many writers find that the more time they spend developing their characters, the more easily ideas begin to flow. You may also find the tips in Lesson 7 helpful for keeping your AI conversations focused.
I like to update the Codex as I go. If the AI generates information that I like, I’ll add it to the Codex entry right away. The next time I send a message, that new information is automatically included. This means if you switch between chats, you don’t have to worry about re-stating all the new details in your first message.
Creating and extracting new characters
Sometimes, in the middle of a brainstorming session, you might realize you need a whole cast of new background characters. They don’t necessarily drive the plot, but having a fully realized town can give you a pool of people to draw from later.
However, adding them manually, one-by-one, can be quite tedious. The Extract button works the same way in a Chat message as it does for a snippet (which we covered in lesson 3), making this process quick and easy.
In a cozy mystery, there is often a large number of background characters that add vibrancy to the community. When writing a series, it’s helpful to have enough characters to make the town feel real. Plus, if you quickly need a new suspect, you have some established characters ready to go!
Here’s how you can do it step-by-step:
In Chat, brainstorm a list of potential characters, locations, or other items.
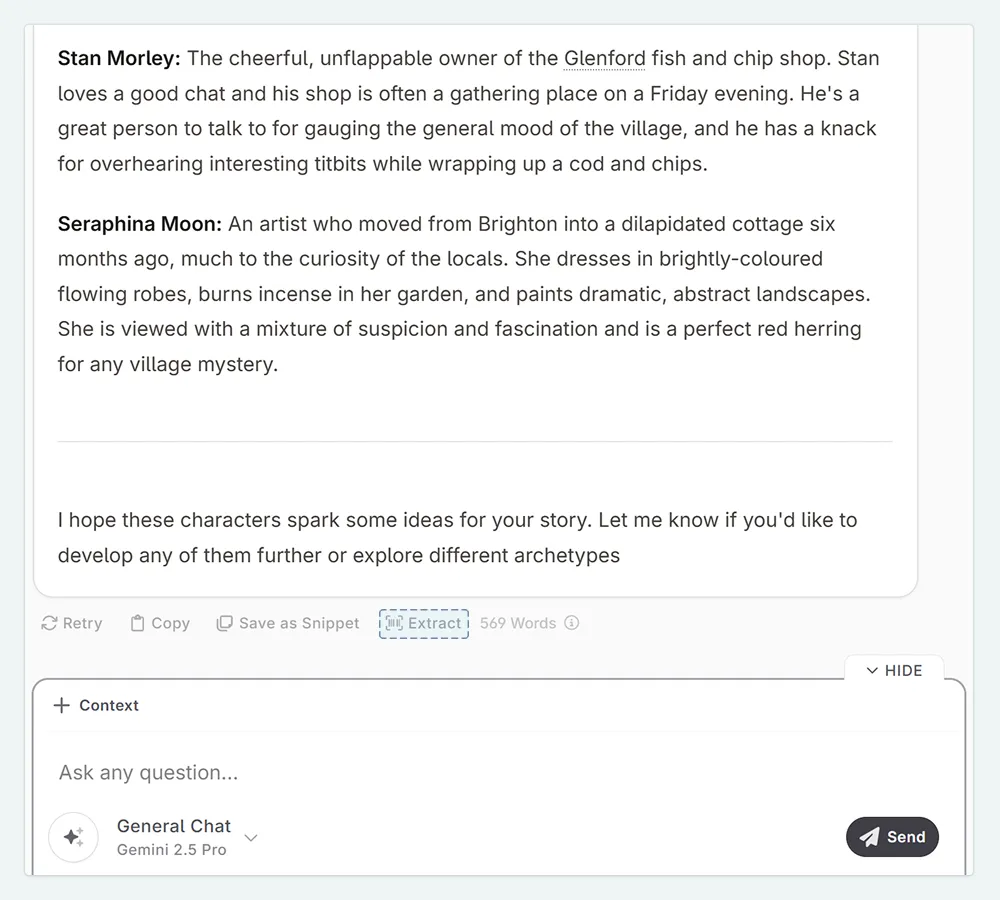
Once the AI has replied with your list of potential entries, click Extract at the bottom of the AI response.
A new pop-up window will appear. To add our entries to the Codex, we’ll go to the Codex Entries tab. You’ll see a list of cards for each potential entry.
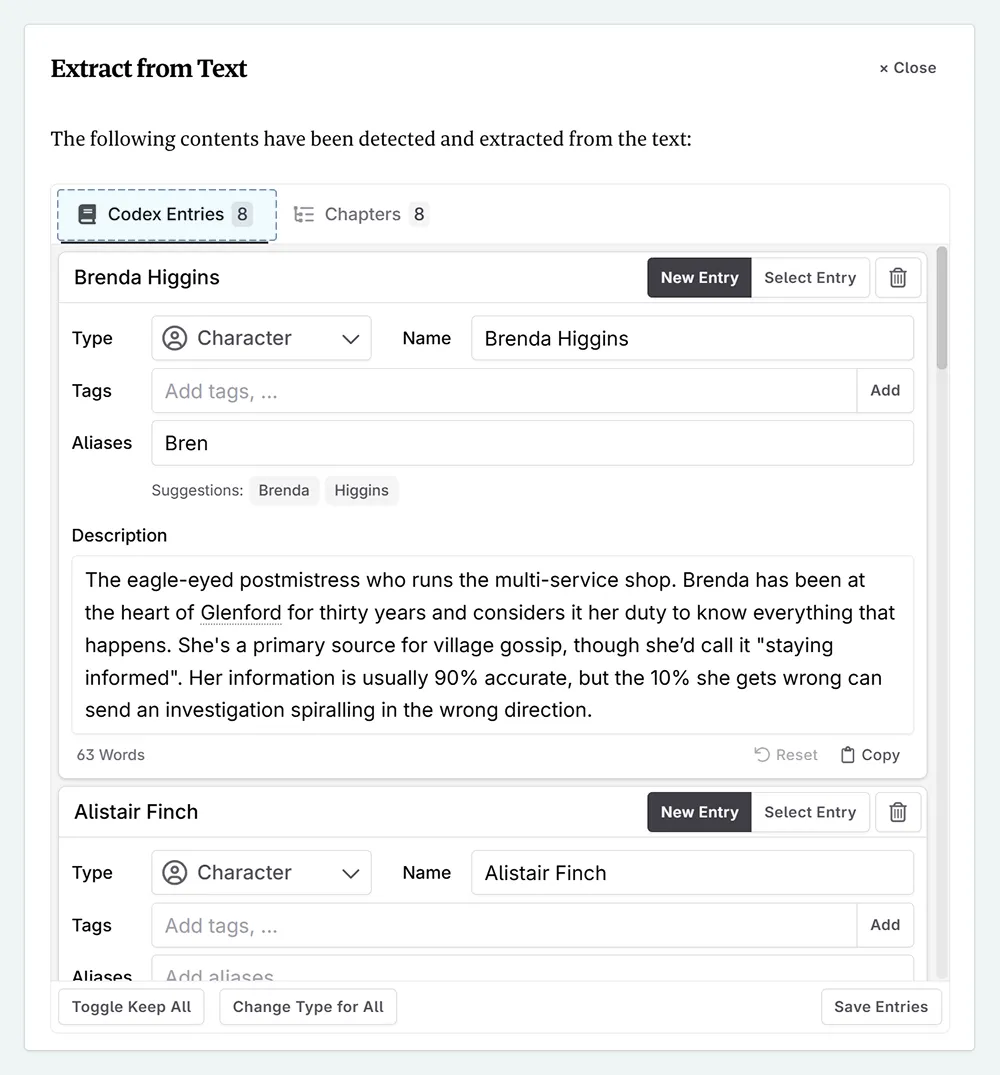
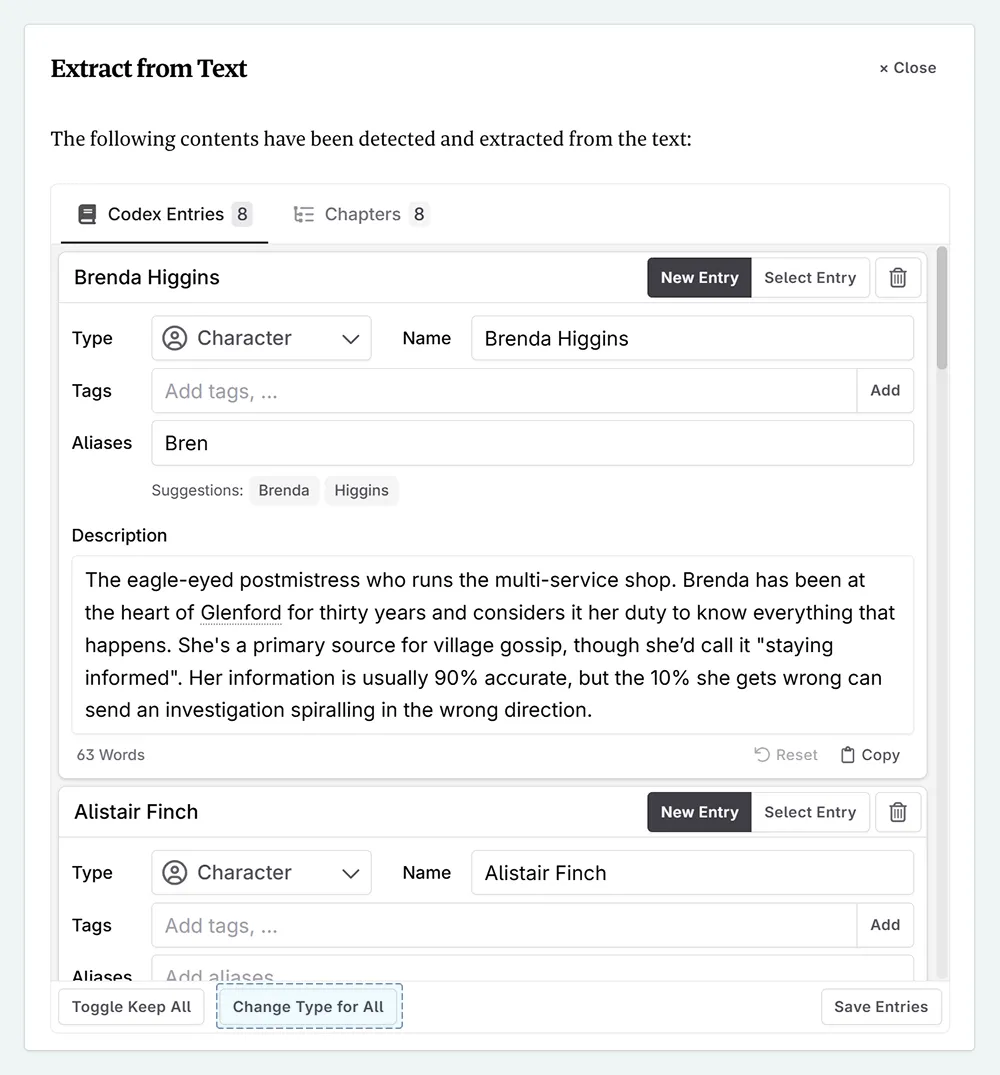
The default Codex type is ‘character’. If you were extracting different types of entries, you could change them individually or all at once with Change Type for All . Since we only have characters here, we can leave it as is.
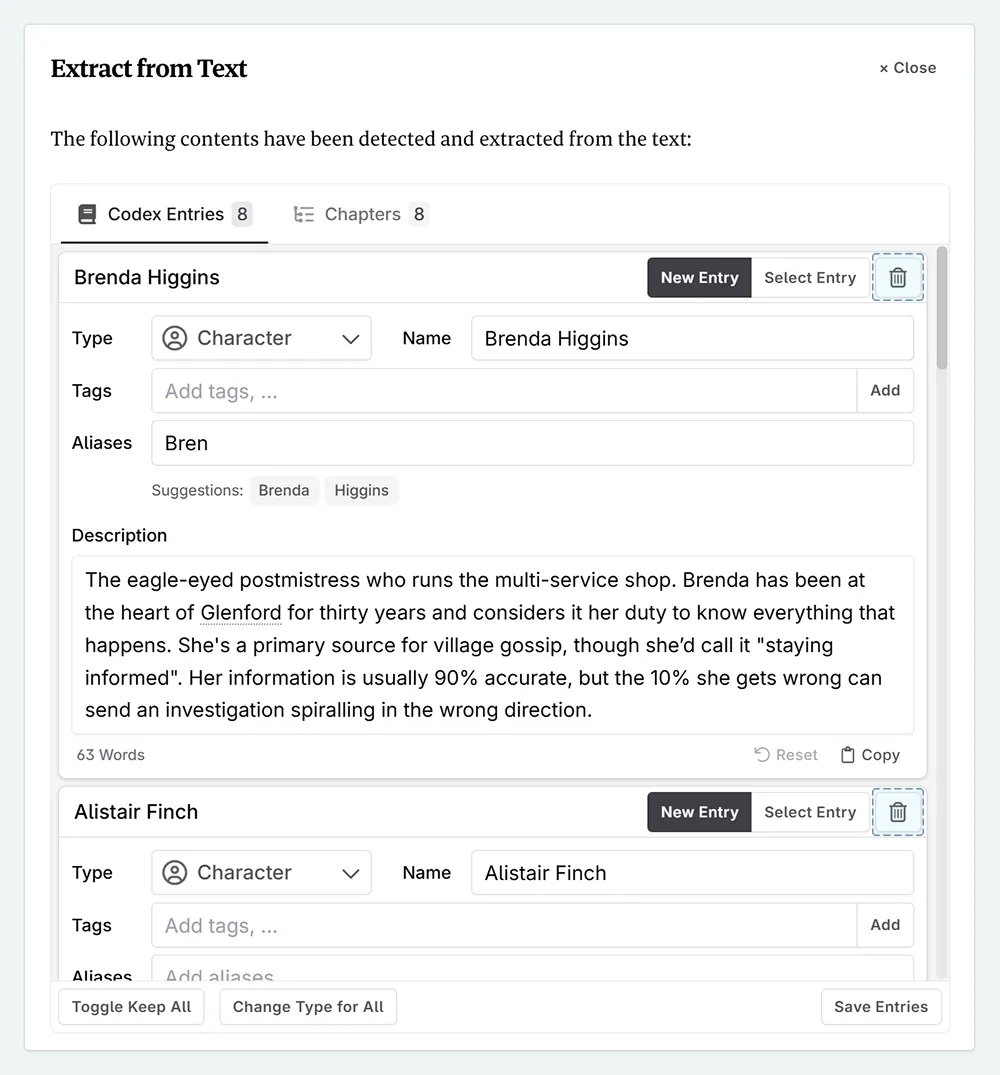
If it has picked up too many entries, you can discard individual entries using the “trash” button.
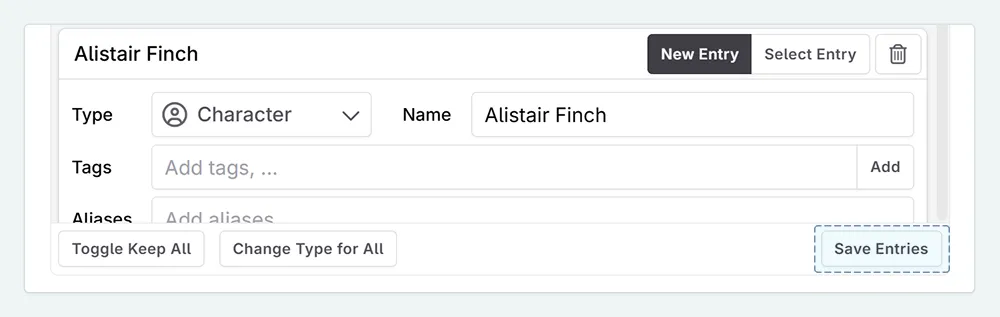
Click Save Entries to finish.
Wrapping up
You can use this process to brainstorm anything, such as locations, objects, or lore. Remember, you can always go into the Codex later to manually add your own details or refine what the AI generated. Now, with Chat, you have another way to build your story’s world.
In Part 3 (coming soon), you will learn how to further organize and refine your Codex entries.
This lesson was taught by:
Kate
Based in the UK, Kate has been writing since she was young, driven by a burning need to get the vivid tales in her head down on paper… or the computer screen.