
- Level:
- Novice
- Lessons:
- 18 Lessons
Setting up the Codex
Learn new ways to add Codex entries to your project, including Quick Create and via Extract.
- Reading Time
- approx. 5 min
As your story grows, so does the list of things to remember: characters, locations, objects of significance, your subplots, lore… Good organization helps maintain story coherence (keeping your story consistent) and avoid plot holes (gaps in your story logic).
To help you with this, Novelcrafter has the Codex. The Codex is your story’s central reference hub. It holds all the things already mentioned and anything else you want to keep records of.
In this lesson, we’ll move your brainstorm notes from the previous lesson (which we stored in Snippets) into the Codex using four simple methods: Manual entry, Text Selection, Extract, and the handy Quick Create.
The Codex works automatically in the background, but you can always access it through the sidebar on the left.
Manual Codex creation
Let’s start with our story premise (as in, the core concept/central struggle of our story). Since this is a single, specific concept, we’ll create this entry manually:
At the top of the left-hand sidebar, click + New Entry .
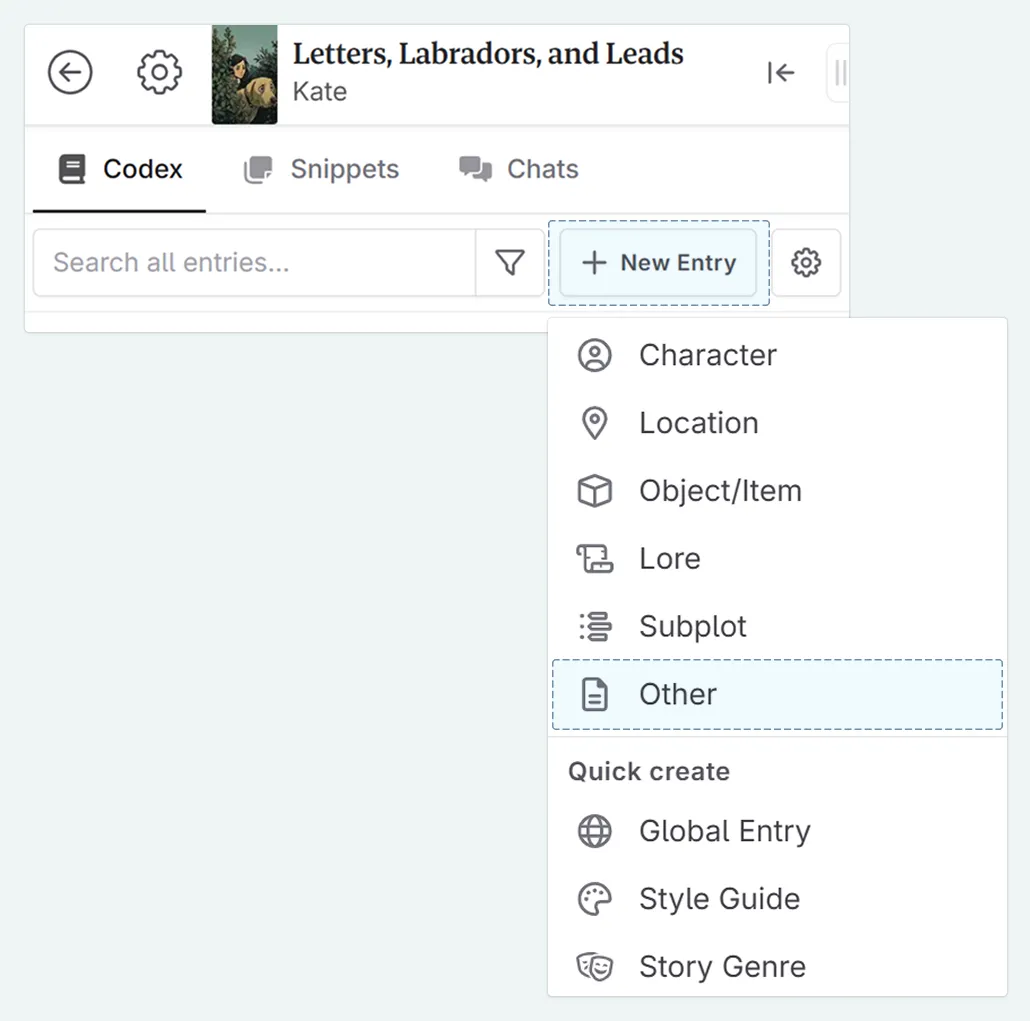
Select Other from the dropdown.
A floating panel with our blank Codex entry will appear. If you click outside the entry window, it closes (if we don’t add anything it won’t save and clutter out codex).
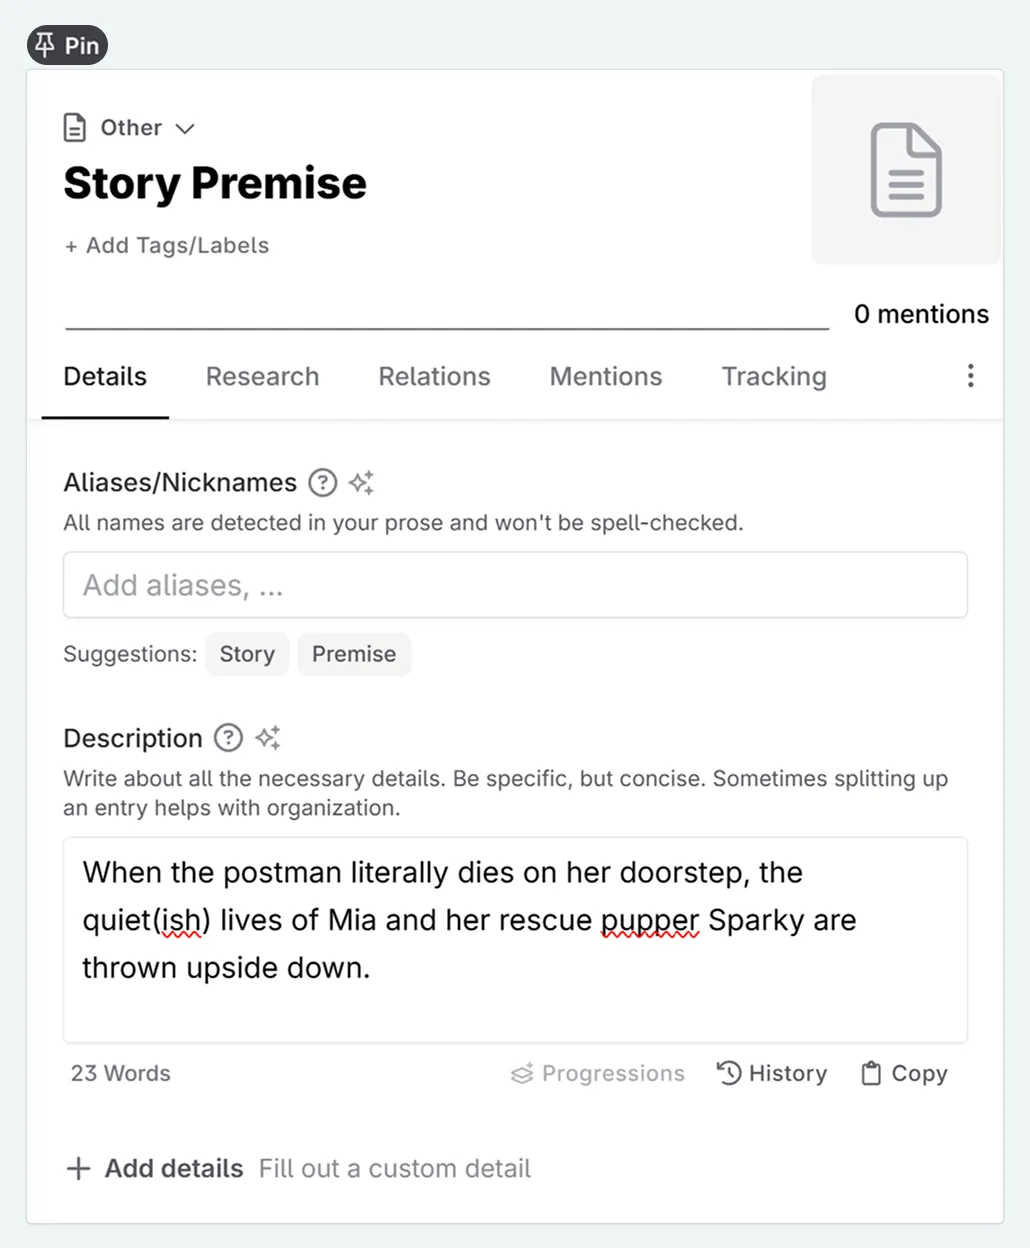
Name your Codex entry (Story Premise in this case) and in the description write in your story’s main idea. Your changes autosave. You can close the entry when you’re done.
Creating characters from text selection
For character names that appear in our notes, we can save time by selecting the name directly.
Select a character or location name in your text, then choose + Codex Entry . The name gets used as the new entry’s title automatically.

If you select a sentence or paragraph instead, Novelcrafter puts that text in the entry’s description field.
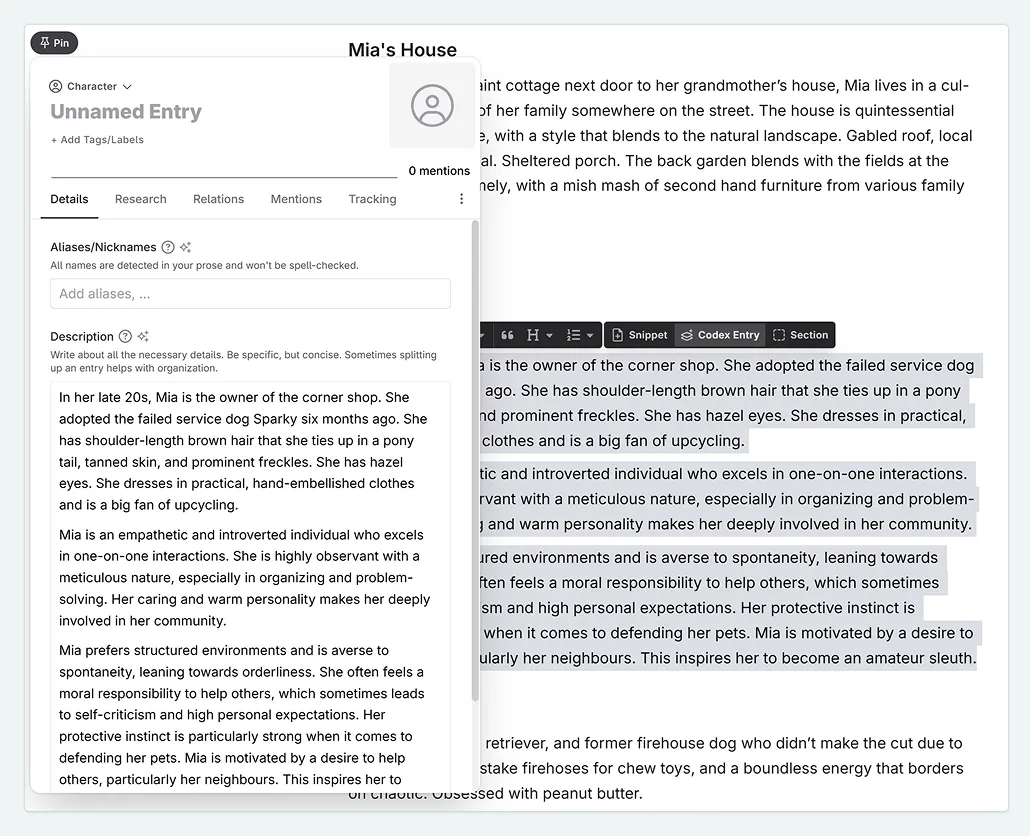
But a character isn’t only their name and description. Let’s take another look at the Codex entry. Between the title and description we have the Aliases/Nicknames detail. Here we can add any other names this person is called, to associate the aliases with the entry.
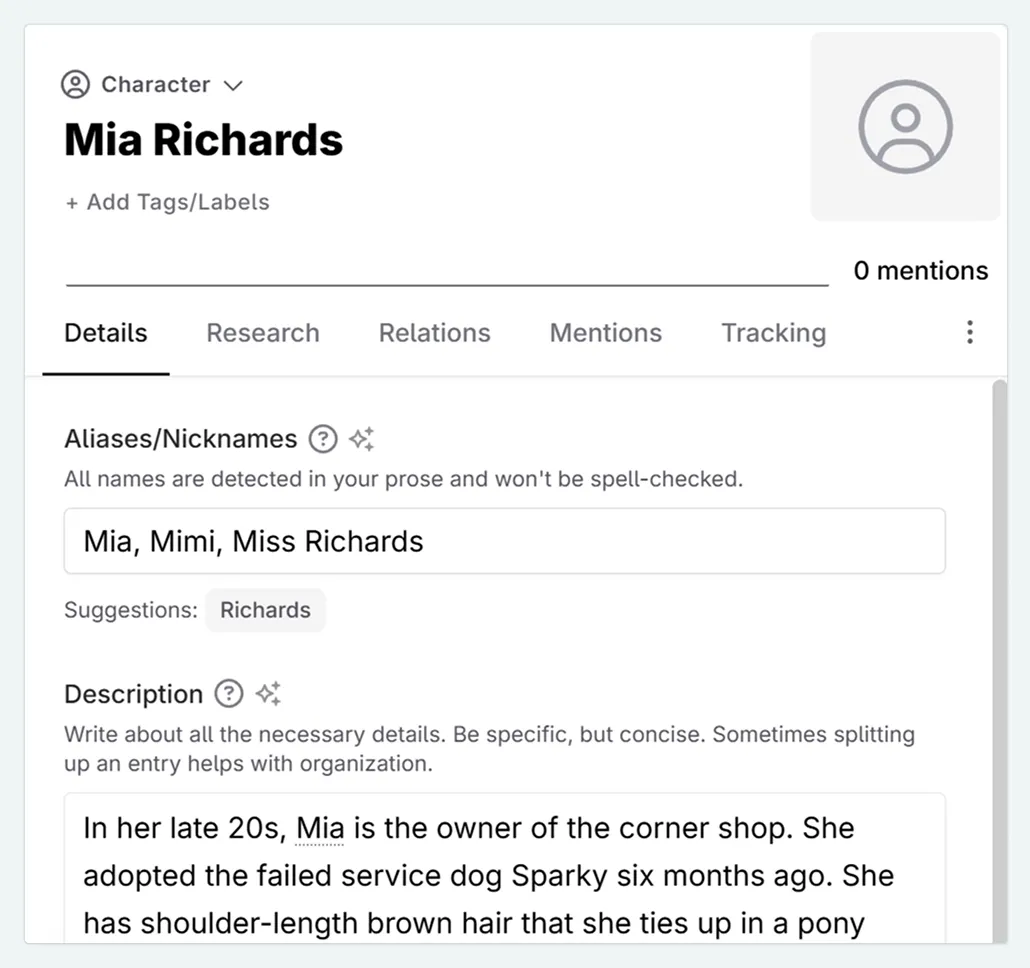
Mia Richards is not called Mia Richards every time she is mentioned. She is called “Mia” in daily life, “Miss Richards” by young children in the village, and “Mimi” by her closest family. Therefore, in the Codex entry I will give the following aliases (delimited by a comma): Mia, Mimi, Miss Richards.
Mentions
When a name or alias appears in your text, Novelcrafter shows a thin underline. Click it to open a little preview card of the associated entry. If you’re in the full view of an entry, you can see all mentions across a project by looking in its Mentions tab.
Adding multiple locations with Extract
If you’ve organized items like locations under headings in your notes, the Extract feature is a huge time-saver. It can turn that entire list into multiple Codex entries at once.
In the snippet containing your list, go to the Actions Menu (three dots)
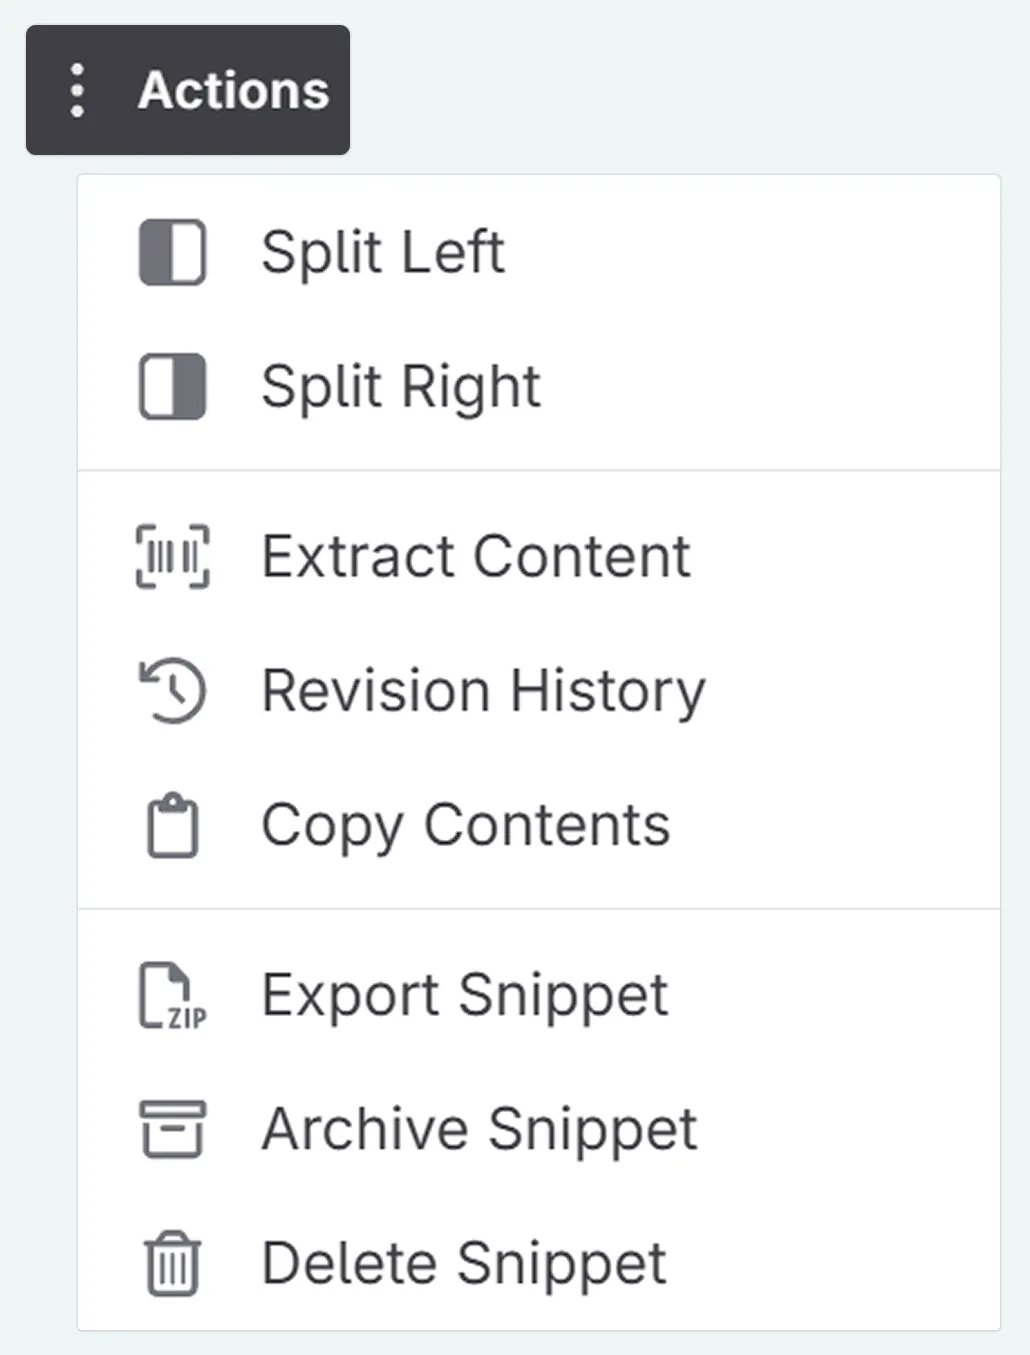
Select Extract
A pop up window will appear. For adding our entries to the Codex, we go to the Codex Entries tab. You’ll see a list of cards for each potential entry.
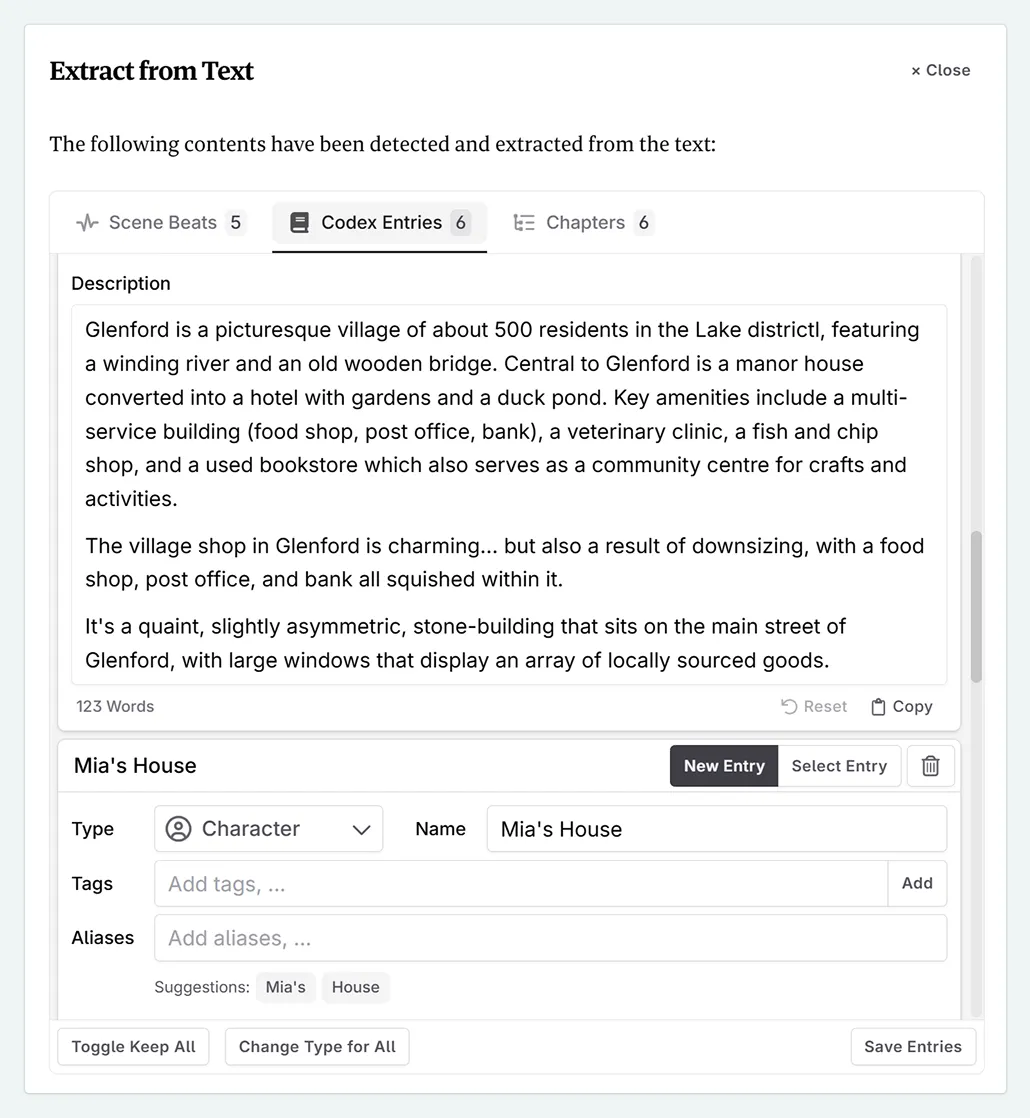
Select or deselect the entries you want to create.
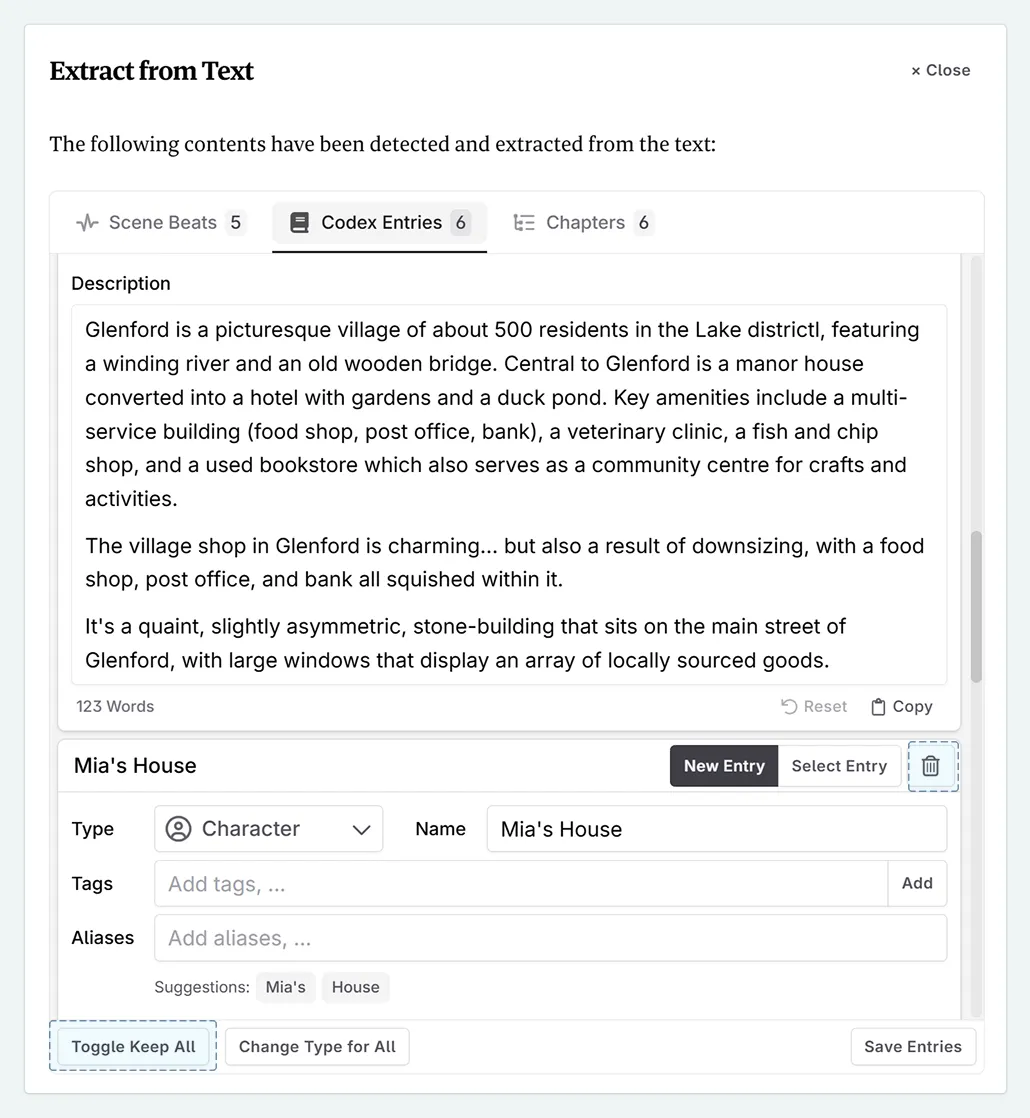
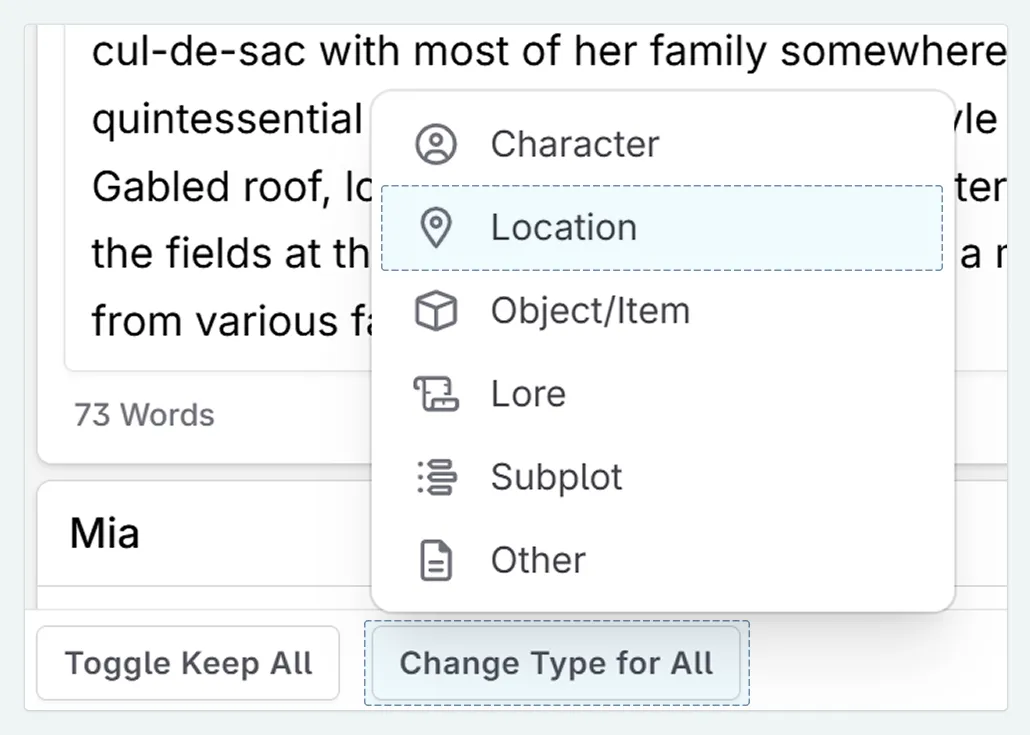
The default Codex type is ‘character’. You can change these individually, or change them all at once by clicking Change Type for All at the bottom. Let’s change them all to ‘location’.
Click Save Entries to finish.
Quick Create for story elements
Now that we have our story premise, characters, and locations added to the Codex, let’s add some foundational information about our story’s style and genre. For common elements like these, Novelcrafter offers Quick Create, which gives you ready-made entries with helpful defaults.
At the top of the left-hand sidebar, once again, click + New Entry
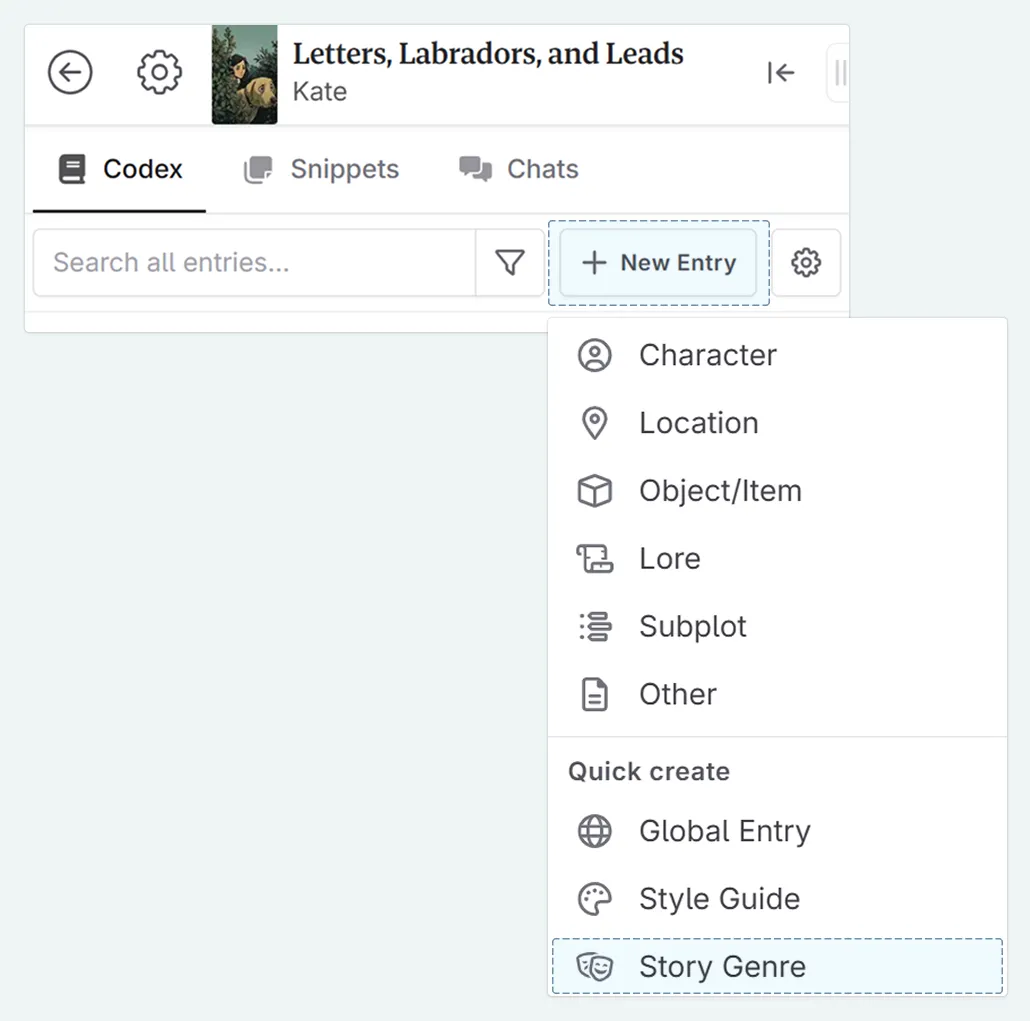
This time, select Story Genre from the “Quick Create” section.
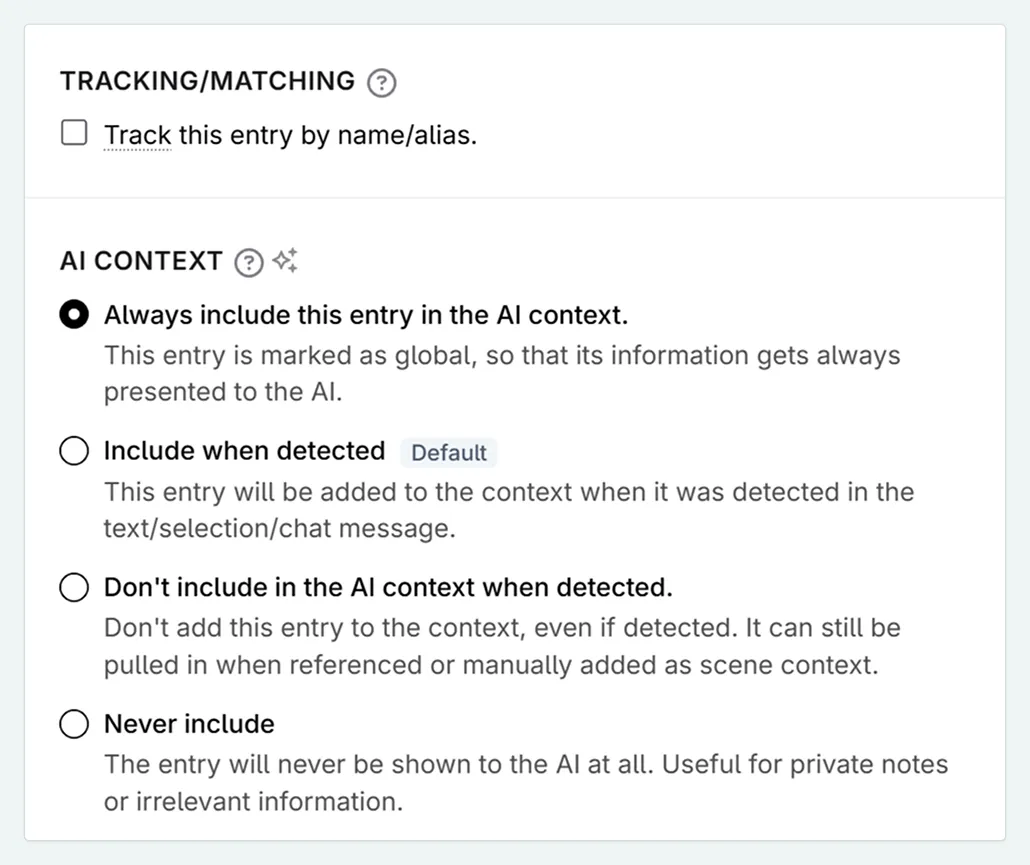
A floating panel with the pre-named “Story Genre” entry will appear. Note that in the Tracking tab, automatic linking is set to off for this entry. Also, in the AI Settings section, ‘Always Include’ is on, meaning the entry will be added to all AI prompts. This is only relevant if you plan to use Novelcrafter’s AI features.
If you don’t know everything about your genre, or writing style, you can make these entries and put in anything you do know. Codex entries are ‘living documents’ (when used in other parts of the interface, the most recent version is ‘seen’), and so you can update these every time you discover something new.
This is the same for any Codex type, and it is useful to keep checking over Codex entries to remove any information no longer relevant to your story.
How much information should I include in a genre Codex entry?
AI models have been trained on vast amounts of data, so they understand popular genres. However, because no story is a perfect stereotype of its genre, it’s a good idea to be specific. Detailing your unique take on a genre helps you (and any potential AI co-writer) maintain a consistent tone and style.
A small-village cosy mystery in the British countryside with an animal companion. In this genre:
- the mystery is solved through wit, social connections, and observation
- there is minimal danger to protagonist
- there is emphasis on puzzle-solving over action (our hero isn’t running on roofs… probably)
- the tone is light and occasionally comedic
In this genre entry, the language is not formal. You can see some of my natural thought/speech patterns present. This is done intentionally. I want the AI to write like me, so the more samples of my ‘voice’ I feed into it, the more likely it will pick up on nuances. I am writing a cosy mystery with a lot of humour injected into it, so the Codex entry reflects this.
If you were to be writing a horror story, or a gritty historical novel, you would want to adopt a tone similar to the genre expectations.
Experiment to find the level of detail that works best for you. Some writers prefer very detailed entries, while others thrive with sparser notes. See which fits your workflow best!
When to use each method
We’ve covered a lot, so here’s a quick recap of when to use each creation method:
- Manual creation: Best for single, detailed concepts or when transferring one entry from an external source.
- Text selection: When character/location names appear in your existing notes, or you have a paragraph of information about a Codex entry.
- Extract: Perfect for when you’ve listed multiple items under headings in a snippet or chat (see lessons 2 and 7).
- Quick Create: Use for common story elements like genre or style guides to get started quickly.
What is the best layout/length for a Codex entry?
Later in this course, we will go into more detail about Codex entries and ways to organize them. However, it is mostly personal preference, and if you are using one of the mainstream AI models (GPT, Claude, Gemini, Grok etc), the models will be tolerant of any discrepancies.
When I write Codex entries, I like to keep things as simple as possible. There’s a lot of information I know about a character beyond the Codex entry, so I try to ask myself two questions when deciding whether or not to add a fact in:
- Does the information have relevance to the plot, characterization, or location?
- If so, how does this information shape the character’s view?
Say Sparky loves peanut butter. Great. Does it matter to the story? In this case, it does, as Sparky’s ability to sniff out peanuts leads our protagonist to clues. If I wanted to expand on this information, I might write something like: “Sparky’s favourite food is peanut butter. When he sniffs it, his tail wags furiously, and he can’t stop moving. He is known to cause chaos and forget his manners when peanut butter is around.”
Now, if I write a scene set in the park, and there is a family picnic nearby, Sparky’s drive for peanut butter is going to appear.
With your first Codex entries in place, you now have a solid foundation for documenting the next big aspect of a story; what happens in it!
In the next lesson, we’ll jump into the Plan section and create our very first scene.
This lesson was taught by:
Kate
Based in the UK, Kate has been writing since she was young, driven by a burning need to get the vivid tales in her head down on paper… or the computer screen.