
- Level:
- Novice
- Lessons:
- 18 Lessons
Adding your first scenes
Learn how to create and move scenes, chapters, and acts, and add scene summaries to your story.
- Reading Time
- approx. 4 min
At this point in our story, we have Codex entries for our characters, locations, the premise… but we’ve neglected the story itself: its plot points and major moments.
When brainstorming a story, even if you are unsure of specifics, you likely already have actions or moments in your head that you can track for later. So let’s start writing down these ideas.
In this lesson, you’ll create your first scene, add a few scene ideas, and learn how to move scenes, chapters, and acts around.
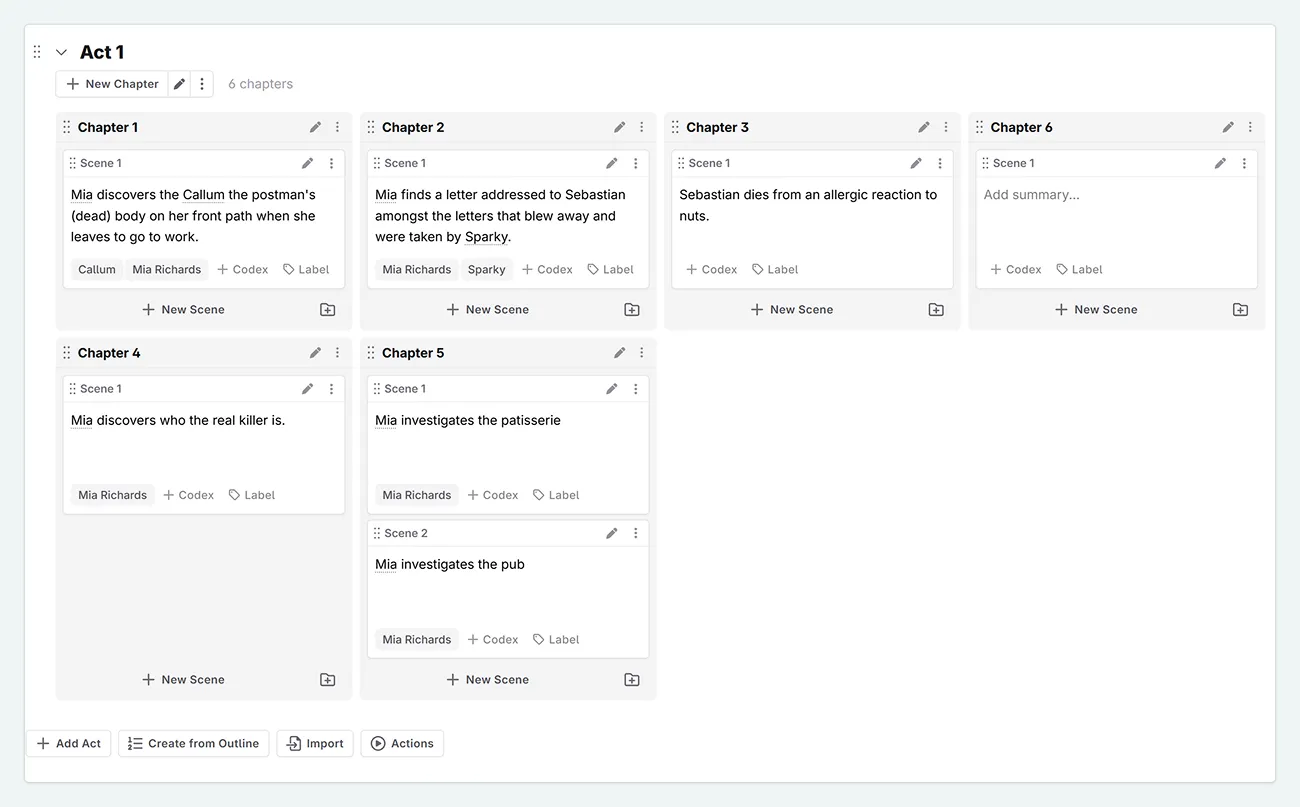
For our Cozy Mystery novel, I already have some ideas for scenes. The mail carrier dying, for instance, that I mentioned in the premise. There will also be the follow-up scene where the murderer succeeds in killing their real target.
Creating scenes in Novelcrafter
Stories are usually written as scenes that are then organized into different chapters, which themselves are split into acts (most books hide these acts, others show them as “Part I” etc. to the reader).
Scenes in Novelcrafter (sometimes also called “sub-chapters” in other writing software) are the base unit for your story. They usually have a clear start, middle and end and often contain conflict caused by your protagonist’s goal.
A chapter may have multiple scenes within it, typically separated by changes in the point of view (see lesson 5), bigger location changes (e.g. your characters travelling around, and you skip parts of the journey), etc.
If we now want to add some moments in our story, we have to enter them into scenes. To create your first scene:
At the top of the screen, click the Plan button if you are not already in the Plan interface.
In the middle of the screen, click + Create First Scene (if you already have a scene, you’re good to go.)
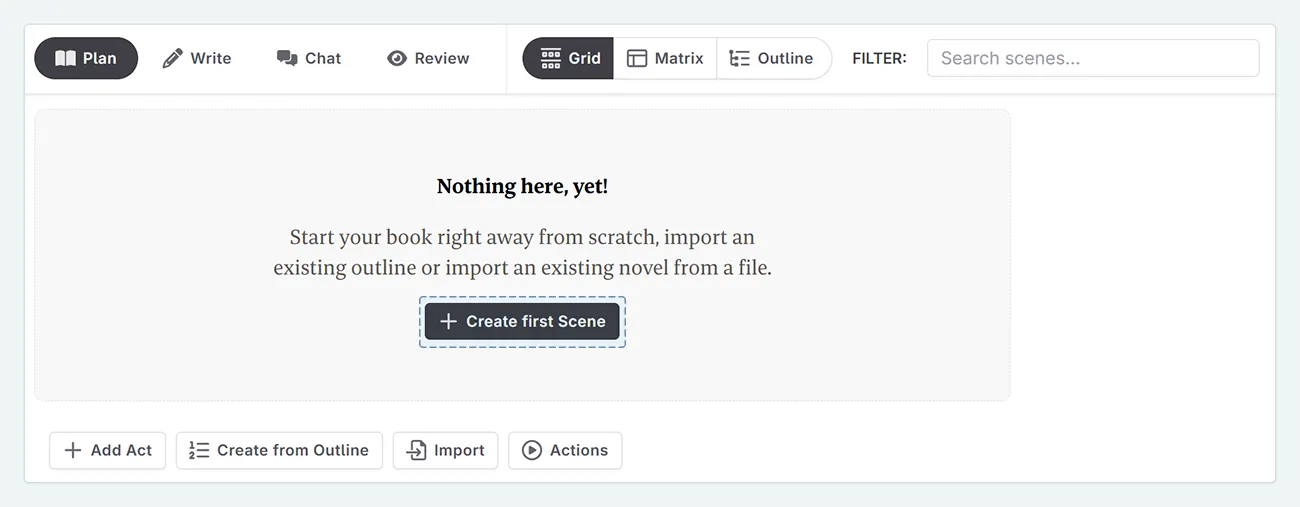
You will see that Novelcrafter has added an empty scene, which is part of a new chapter and act. Think of these as containers for your writing.
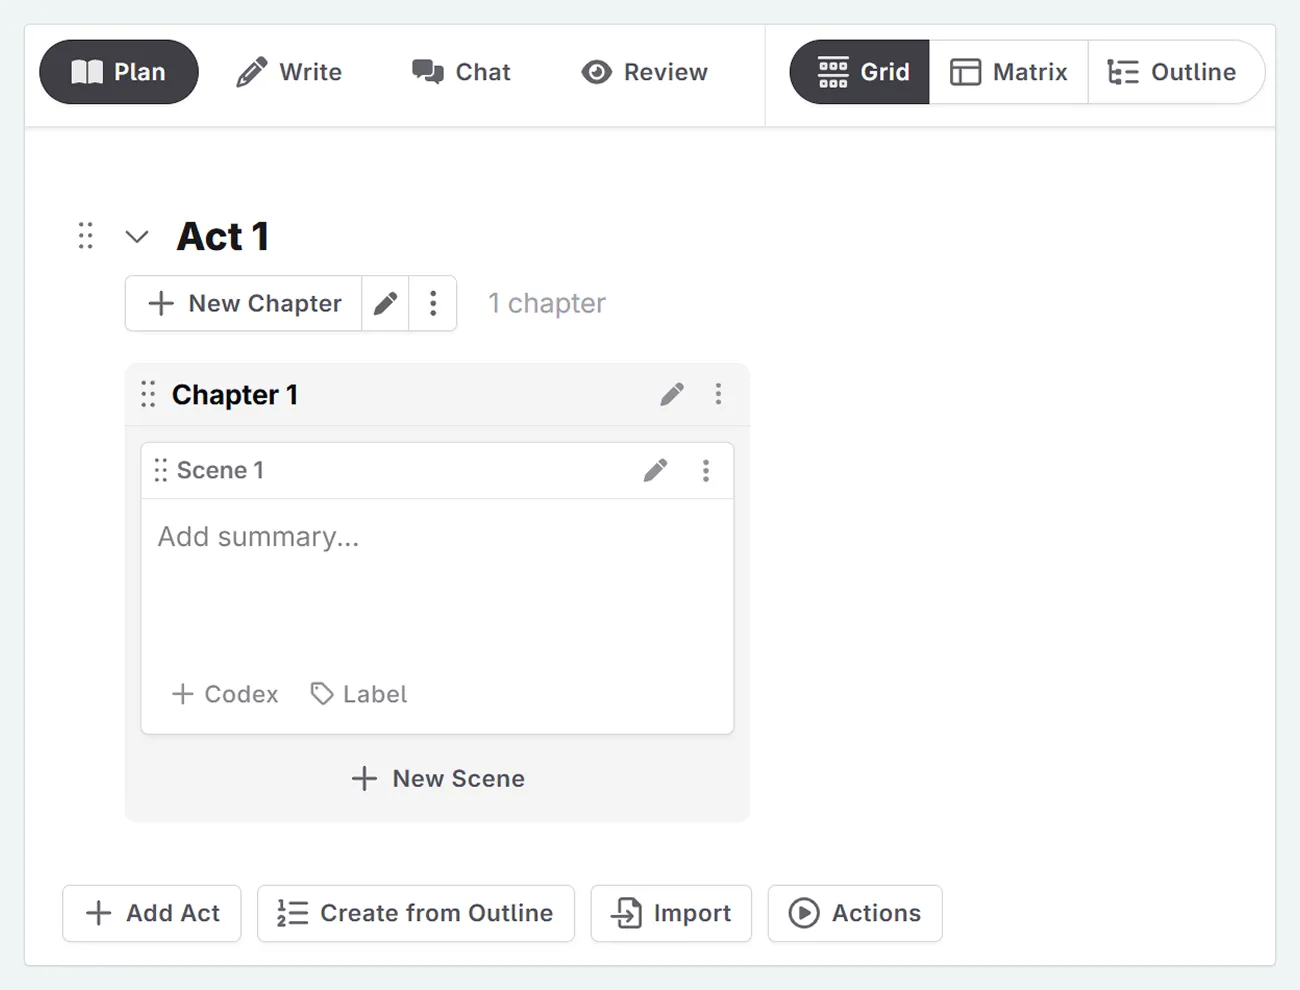
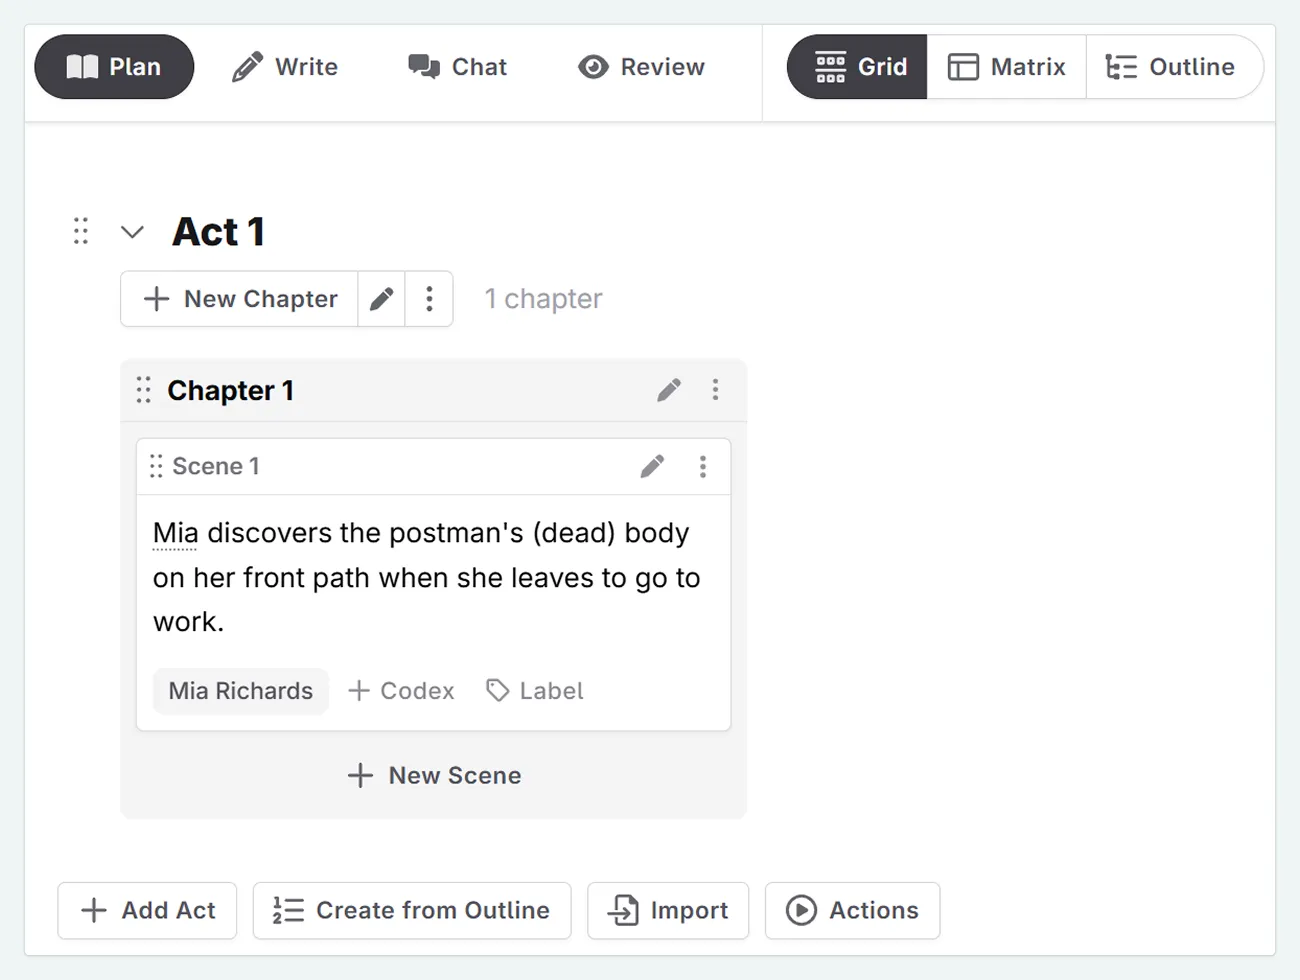
The box shows an area where we can add a summary for what this scene is about, but as we’re just adding our ideas, let’s fill it with some brief notes (e.g. “introduction of the love interest”).
Adding multiple scenes
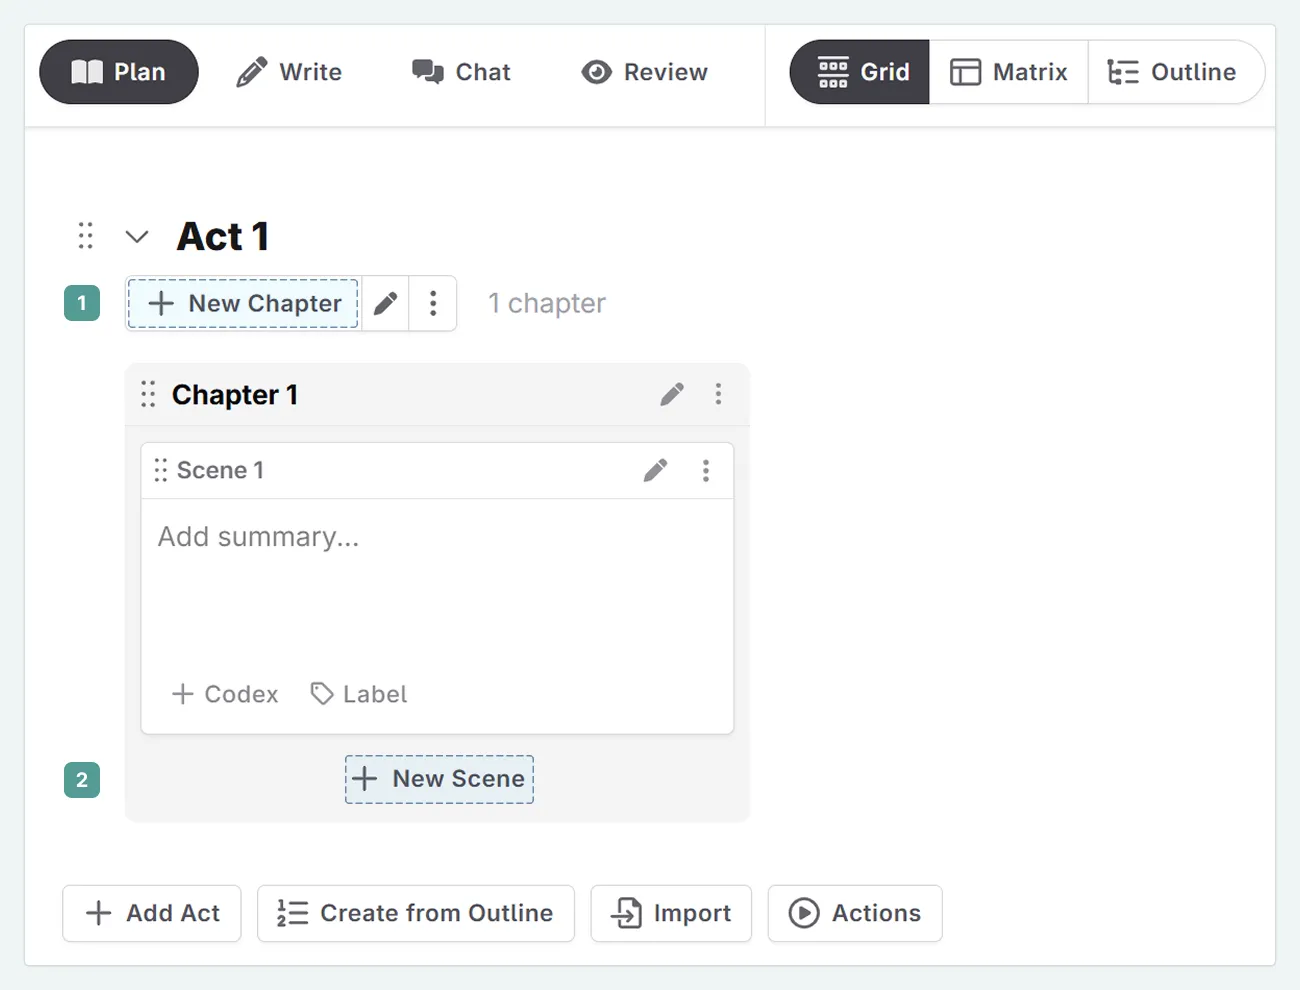
If you have ideas for multiple scenes, you can click + Chapter (1) a few more times, so you have space for each idea. Each chapter contains a new scene. You can also create multiple scenes within one chapter by clicking + Scene within a chapter (2).
Remember that in each scene card, we just want to write a short summary or a few bullet points about what we want to happen here. This is not the place for prose (aka the story writing itself), which we keep in the main Write page (also called the Manuscript).
At this stage, I don’t know everything I want to add, but most stories have standout moments that almost always happen. In a murder mystery, someone is killed, and usually the killer is caught. In many classic detective stories (think Agatha Christie’s “Hercule Poirot”), there’s also a dramatic reveal scene.
For my Cozy Mystery, I have the following scenes in mind (in no real order):
- The killer is caught
- The mail carrier is murdered (as mentioned in our premise)
- The intended victim is killed
- Mia investigates suspects
- The wrong person is arrested
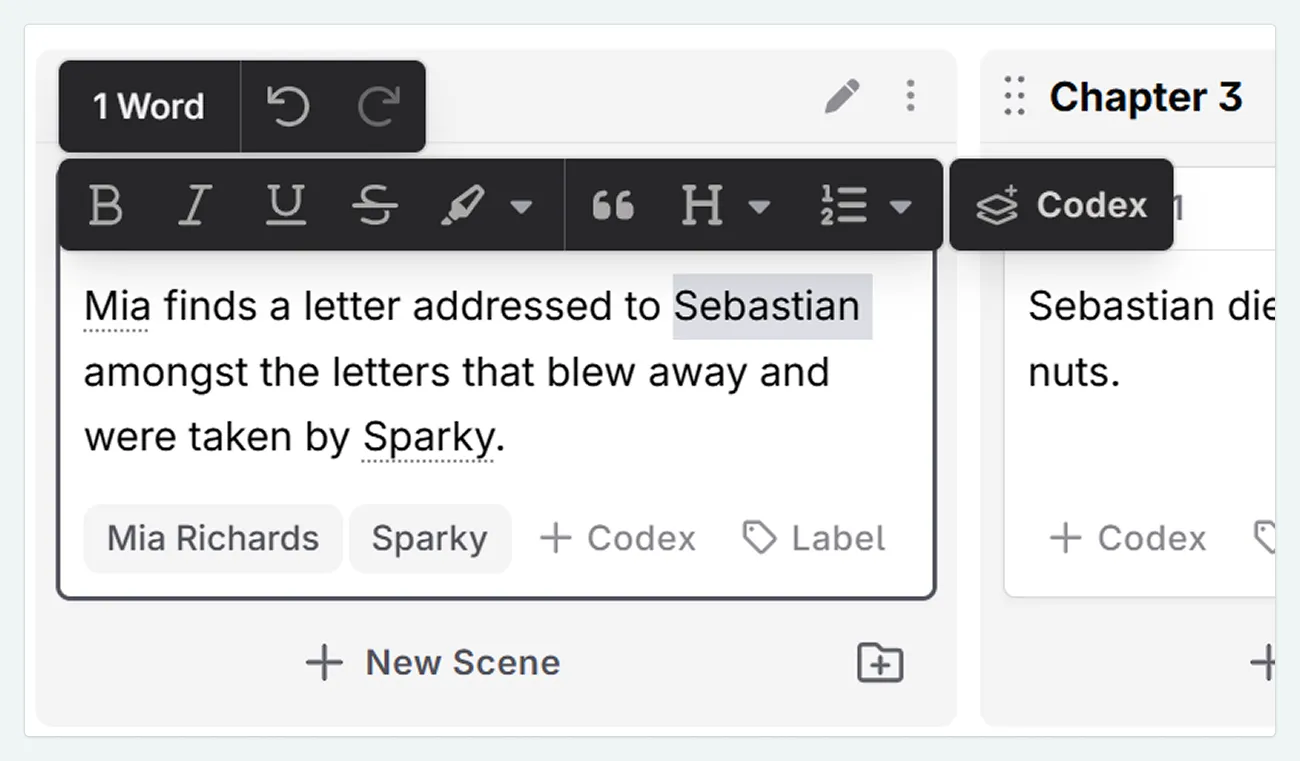
- Our dog Sparky “finds” the letter to the intended victim… that he had hidden in his bed.
I’ll add more scenes as I brainstorm, but this is enough to get started.
Structuring the story
If you’re still writing down your ideas, it’s easier to keep everything in one act. At this stage, it’s getting ideas out onto paper, not making a cohesive plan.
Although if you have come to Novelcrafter with a cohesive plan, there’s nothing to stop you adding it in! If you’re already familiar with story structure, you can arrange your ideas further into acts:
- + Scene to add a new scene to the current chapter
- + Chapter , to add a new chapter to the current act
- + Act to add a new act.
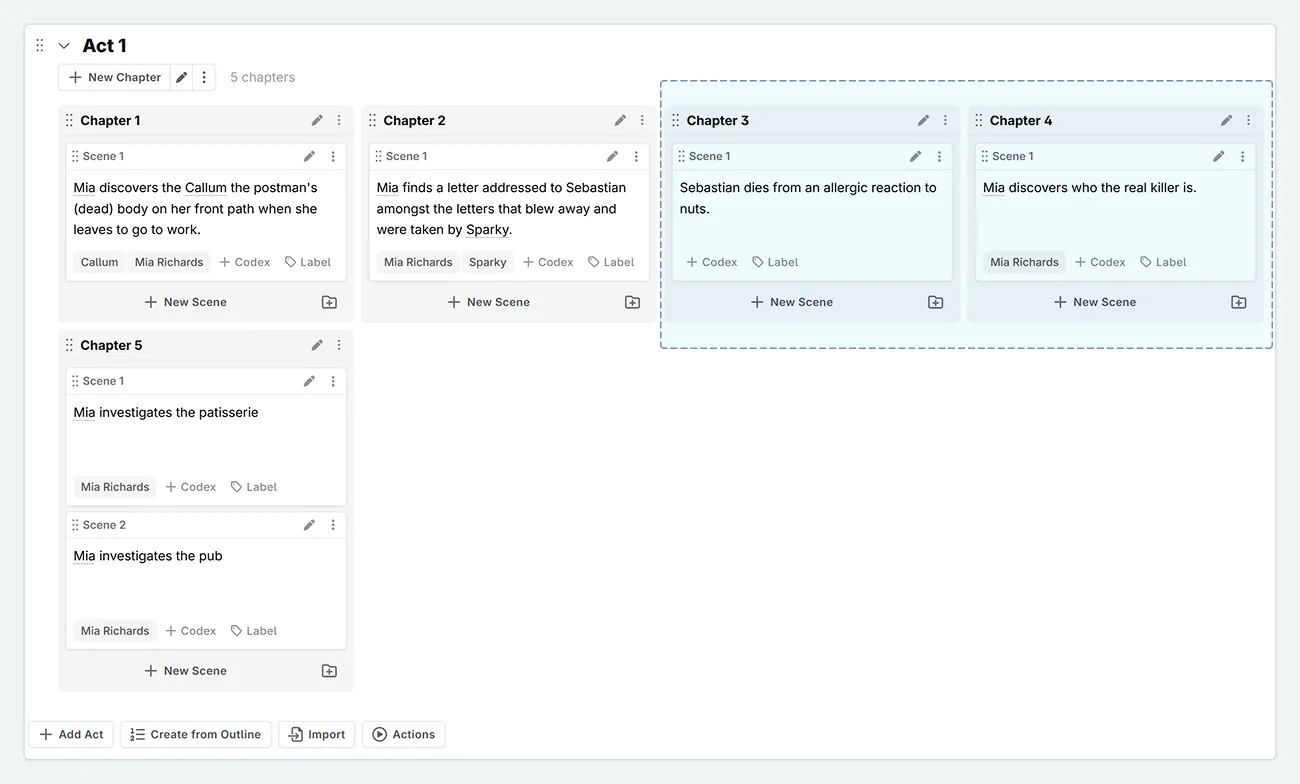
Moving scenes, chapters, and acts
You can rearrange acts, chapters, and scenes freely around by clicking and dragging the six dots to the left of their title:
Move scenes within a chapter or to a different chapter
Move chapters within an act or to a different act
Move acts to change their order
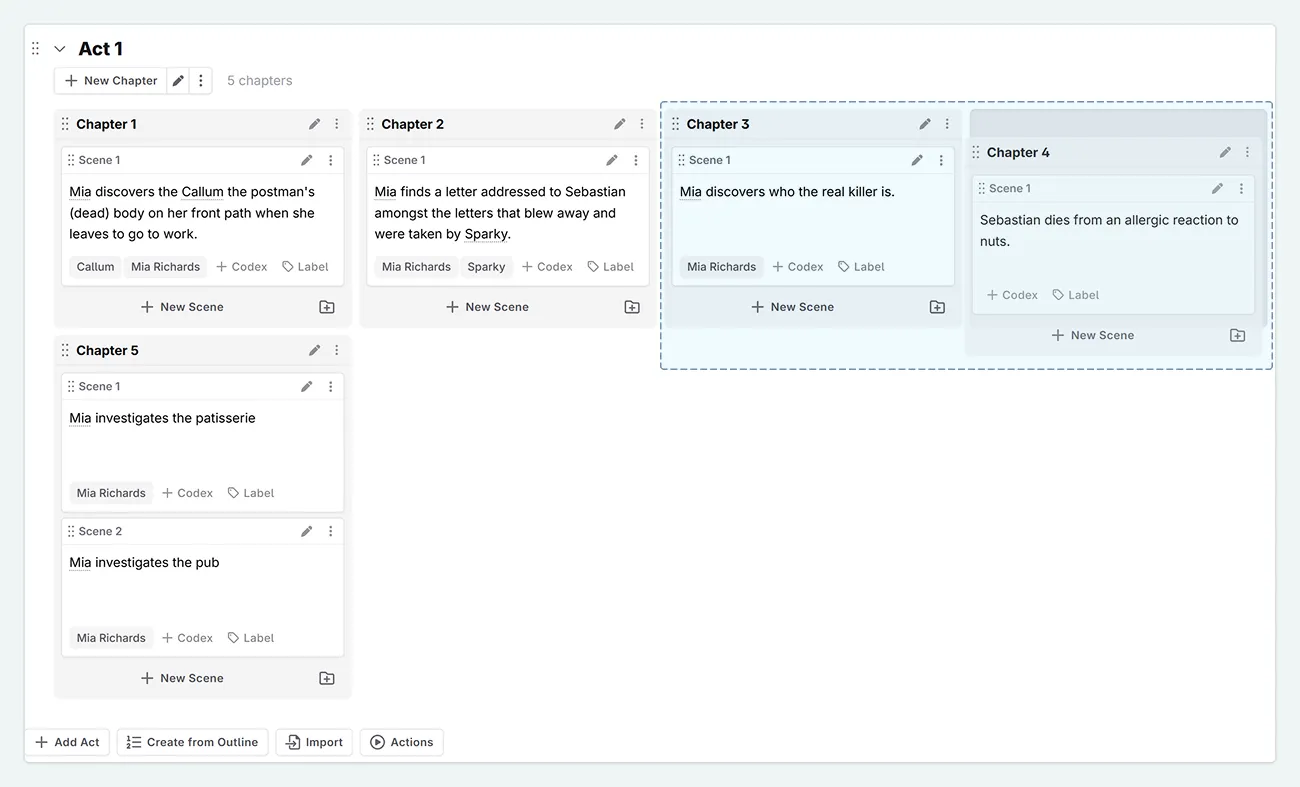
When you move things, the numbering updates automatically. If you move (or add) a chapter between two existing chapters, the numbers will adjust for you. This can be disabled, and we will explain how to in the next lesson.
The Codex in action
As you were adding your ideas, you might have noticed that any names (or aliases) that feature in your Codex have been highlighted as mentions.
Just like with our Snippets, if you write about a new character, place, or item that is not in your Codex yet, select its name and click + Codex in the floating menu to “quick create” a Codex entry. For more information on creating Codex entries, see lesson 3.
That’s it! Your scene ideas can stay rough for now, as we’ll work on them later. You’ve successfully laid out the basic structure of your story and have a visual map to build upon.
Next up, we’ll look at setting the POV (point of view) for each scene and cover how to handle prologues (and other chapters that don’t use standard numbering).
This lesson was taught by:
Kate
Based in the UK, Kate has been writing since she was young, driven by a burning need to get the vivid tales in her head down on paper… or the computer screen.