
- Level:
- Novice
- Lessons:
- 18 Lessons
POV and Prologues
Learn how to set the POV for your novel, and individual scenes, and create a prologue.
- Reading Time
- approx. 3 min
These past lessons we’ve started filling out our Codex, and have some first scenes written down. Now, it’s time to look at how these two areas are linked.
Point of view (POV)
Point of View is the perspective from which a story is told. It’s closely linked with tense (whether we tell our story in the past or present tense).
For any project or novel, you can set a Point of View (POV) for the entire novel, or on a per-scene basis. This setting is composed of a type (1st/2nd/3rd person) and a character entry from your Codex (unless you write in 3rd person omniscient).
Setting a point of view for an entire novel
Let’s start by setting a POV for the entire project.
- In the top left corner, click on the Cog icon to enter your novel settings
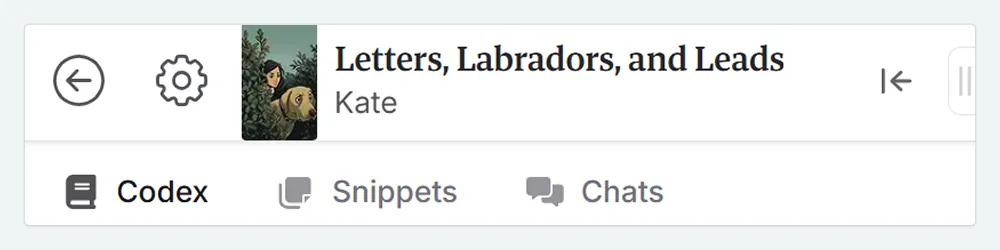
In there, navigate to the Writing tab. You’ll be greeted with some further options.
In the POV section, select the type and character from the dropdown.
In our Cozy Mystery novel, I have chosen Mia to be the POV character for the story, and 3rd person limited for the tense (as cozies are usually in 1st person or 3rd person limited).
Once you’ve set a point of view, this information is included for the AI (if you use it), and allows you to see your story split up in a per-POV spreadsheet-like view in the Plan Matrix (more on that later).
Setting a POV character for a single scene
We now have set a default for all scenes within our project. However, if we want to override this for specific scenes, we need to do this individually:
Locate the scene you want to change the POV for.
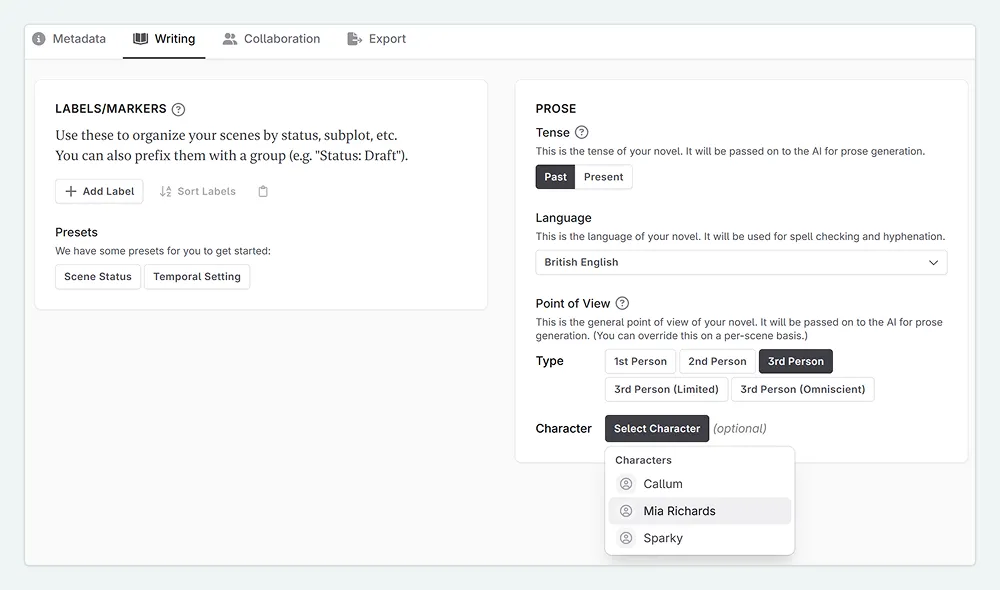
Click on the Scene Actions Menu (three dots) from the Plan or Write interfaces
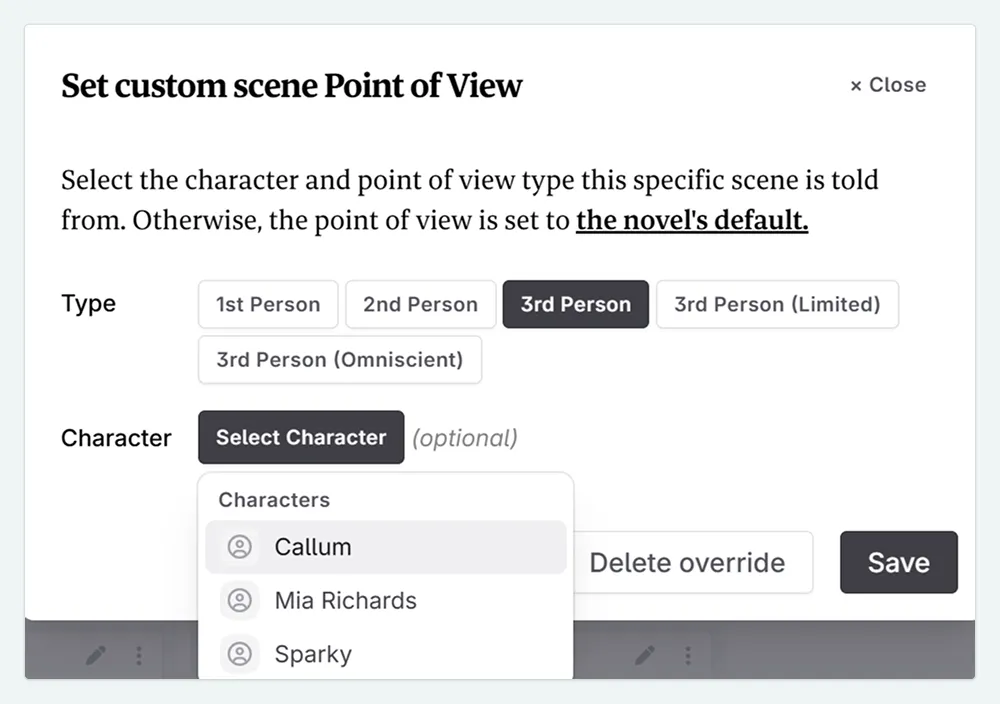
Select Set Custom POV
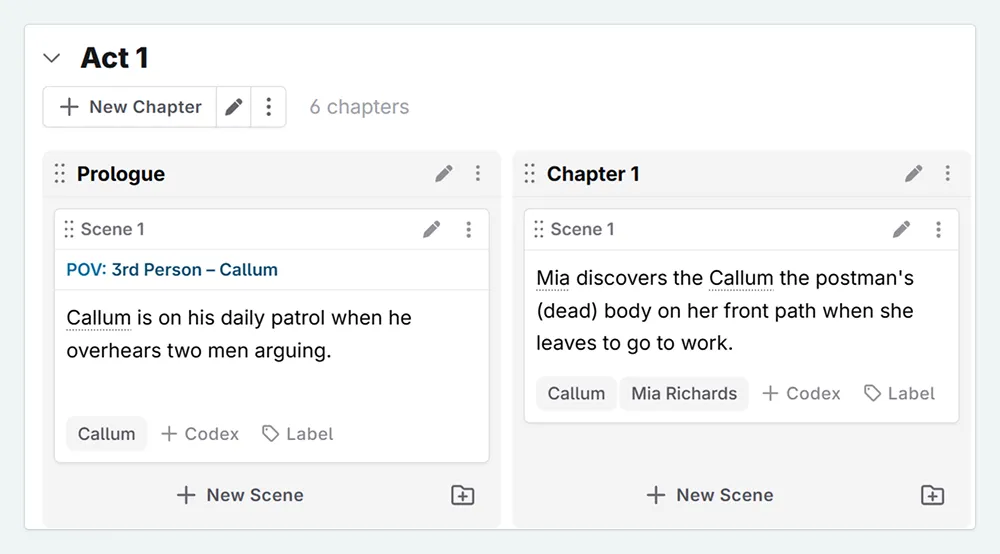
A pop-up window will appear that has settings which look identical to the novel POV settings. Set your custom POV for the scene here. For example, we can change the scene in our prologue to the victim’s POV:
Reusing point of views
When you repeat this for a second scene, you will see that the POV you selected earlier is present. All POVs that you select in your story will appear here for easy-access.
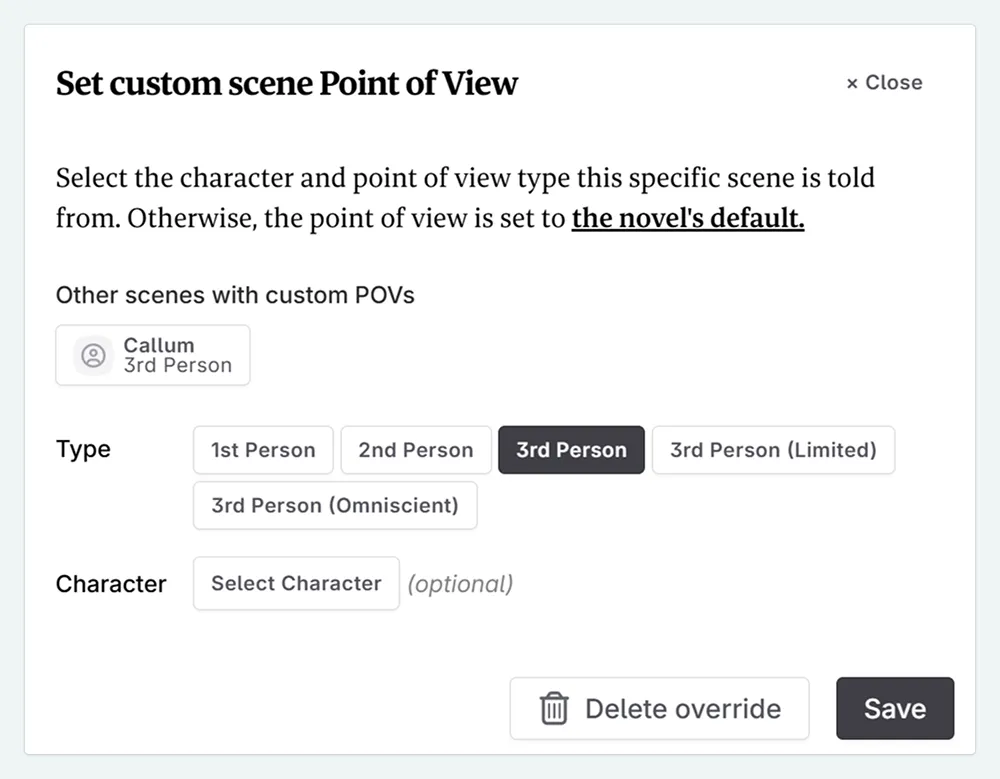
If you have two characters as the POV, I like to choose one of them to be the ‘novel’ POV, and then add the second POV in myself. This saves the time of having to set up both/all POVs manually.
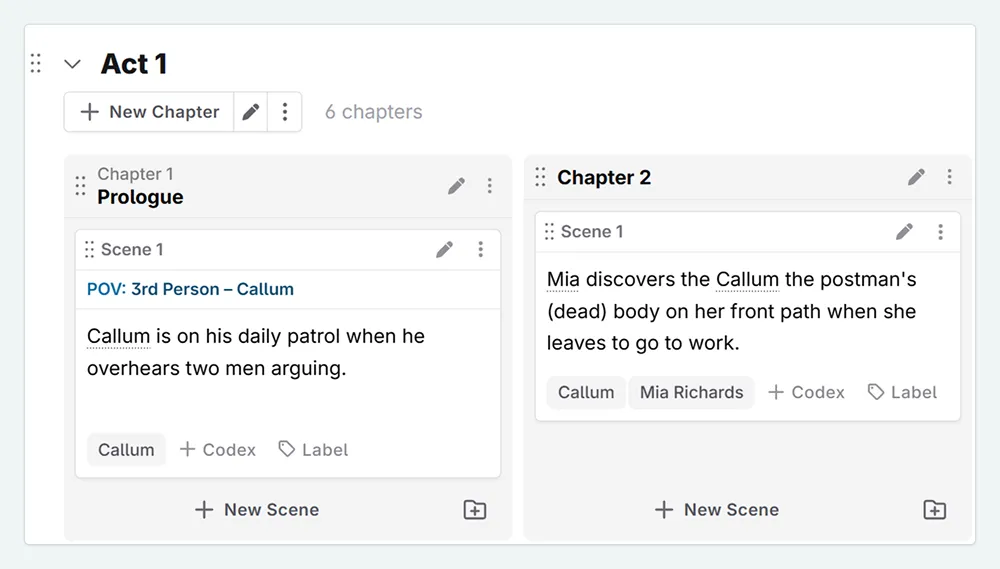
Creating a prologue
As mentioned in the last lesson, some novels, such as detective stories, have a prologue in another POV. If you were to move a chapter to the beginning of its act and rename it ‘Prologue’ (see below), it still has a number for a prefix. It’s still classed as chapter one, and chapter one will be considered chapter two.
Let’s correct this:
Click on the Chapter Actions Menu (three dots) on our Prologue
In the dropdown, the top option includes a toggle for Automatic Numbering , which you can disable.
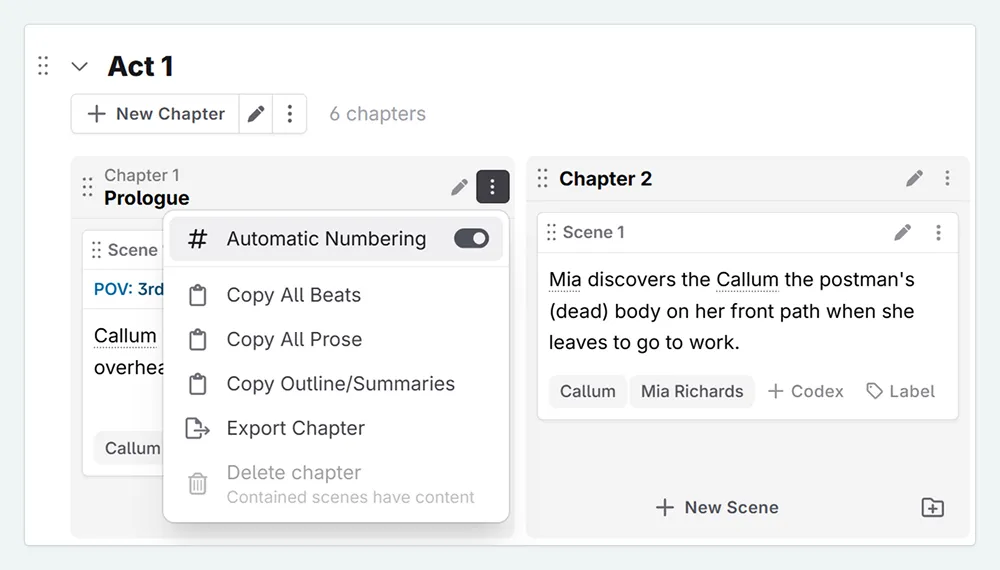
It’s that easy; your prologue is now a proper Prologue, and chapter one is now assigned correctly. The same premise can be applied to any interludes and epilogues you might have.
And that’s a wrap! You’ve now learned how to set a default POV for your entire novel, assign custom POVs to individual scenes, and correctly format a chapter as a prologue.
This lesson was taught by:
Kate
Based in the UK, Kate has been writing since she was young, driven by a burning need to get the vivid tales in her head down on paper… or the computer screen.