
- Level:
- Novice
- Lessons:
- 18 Lessons
Organizing the Codex
Organize your Codex by assigning thumbnail images and colors to your entries.
- Reading Time
- approx. 3 min
In our last lesson, we explored how the Codex and Chat work together. Now that our world is getting fuller, let’s get it organized.
Key Takeaways
- Make your Codex entries easily recognizable by assigning thumbnails
- Assign colors to Codex entries to show related entries, or make them stand out in your prose
- Assign tags to Codex entries to denote key information (and keep it from the AI context)
- Learn how to customize the sidebar display to fit your preferred workflow.
Assigning images
An image provides an instant reminder of a character’s face, a location’s atmosphere, or the look of a magical item. Let’s add an image to a Codex entry.
- Click on the Codex entry you want to update
- Find the image icon in the top right of the entry. When you hover over it, you can either paste an image link or upload one from your device
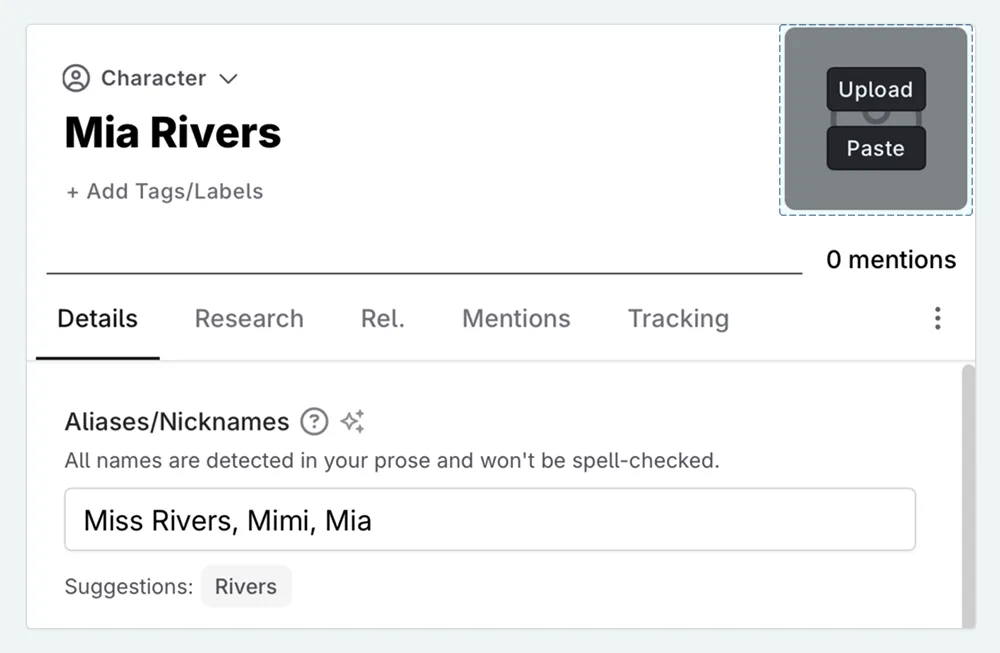
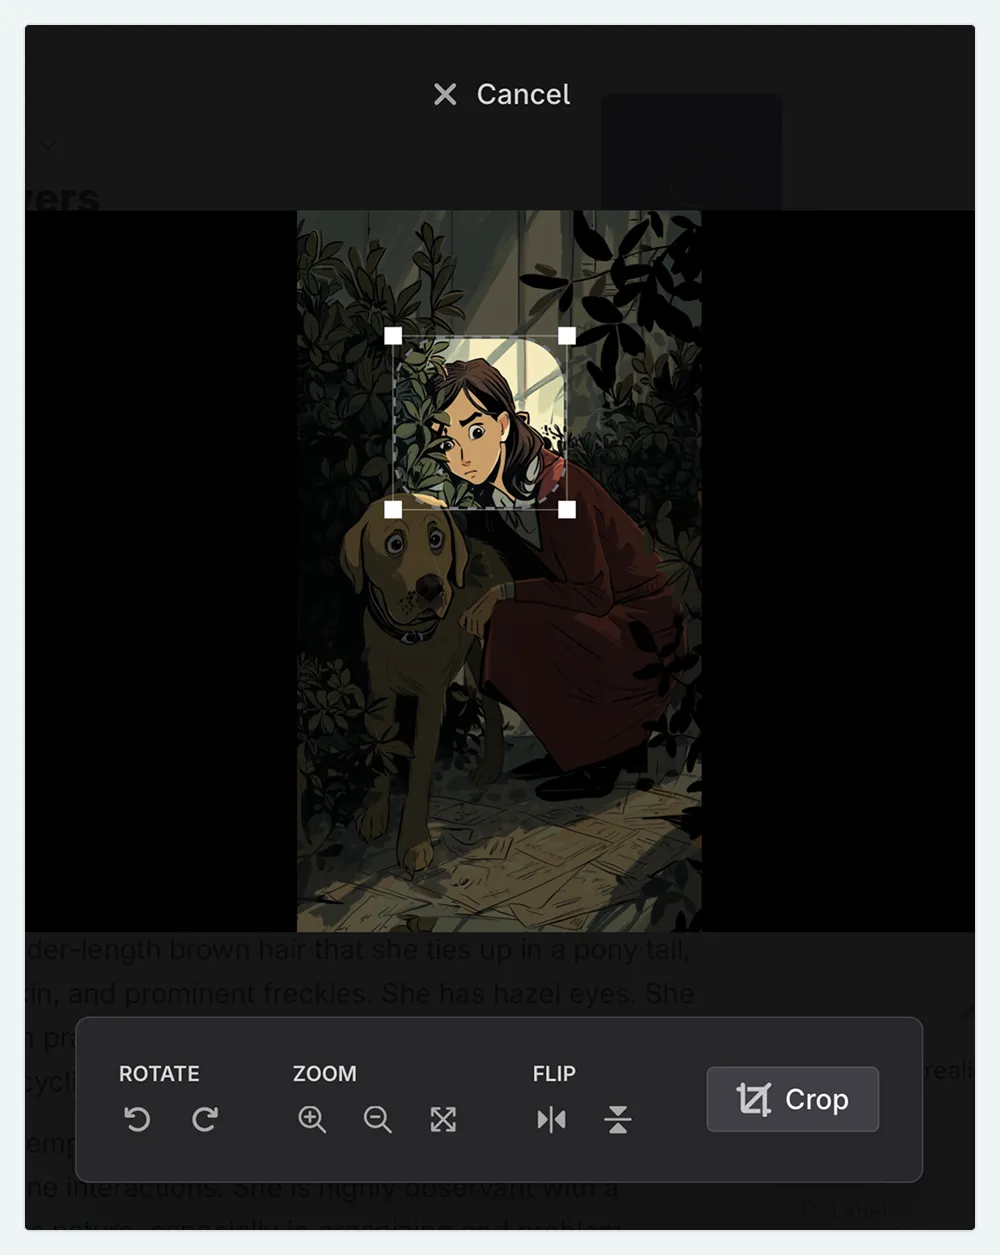
- Select your image, and resize (if necessary)
You can add or change an image at any time in your workflow.

I like to assign images to everything. It helps me visualize my world at a glance. Since Codex images are square (a 1:1 ratio), I often use portraits for my characters so I can clearly see their faces.
Also, if there are terms I’m unsure about, whether it’s cuisine, a fantasy language term, or a planet, an image defines it instantly, saving me from going into the Codex entry.
Adding color
To make an entry stand out in the Codex, you can assign it a color. For example, you might want to easily spot your POV (Point of View) characters in a long list, or keep track of the magical items in your story. To assign a color to a Codex entry:
- Open the Codex entry
- Click ⋮ (the actions menu)
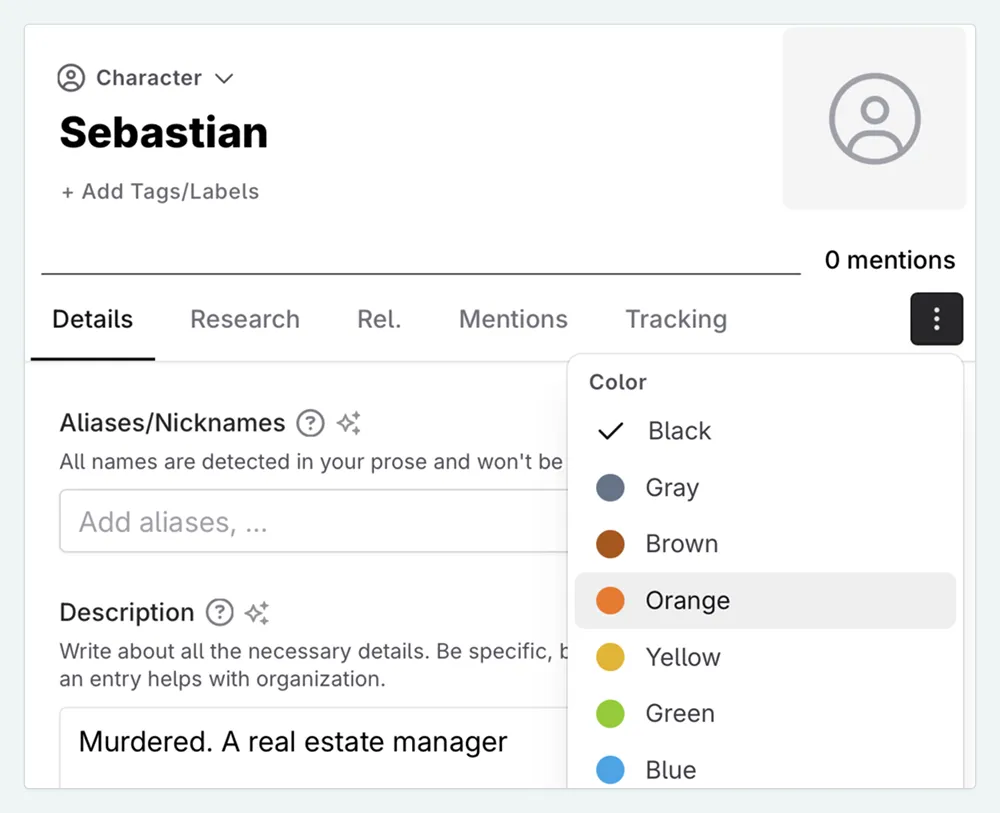
- Choose a color from the list
I’m going to color the suspects in my story red, and my victims orange. You might decide to highlight key words—say, spells or magic terms, a significant object, or even words you know you use too often.
Learn more about tracking wordsThe colors you assigned now pop up throughout Novelcrafter. For example, in the Plan interface, the Codex entries of my victims now appear in color.

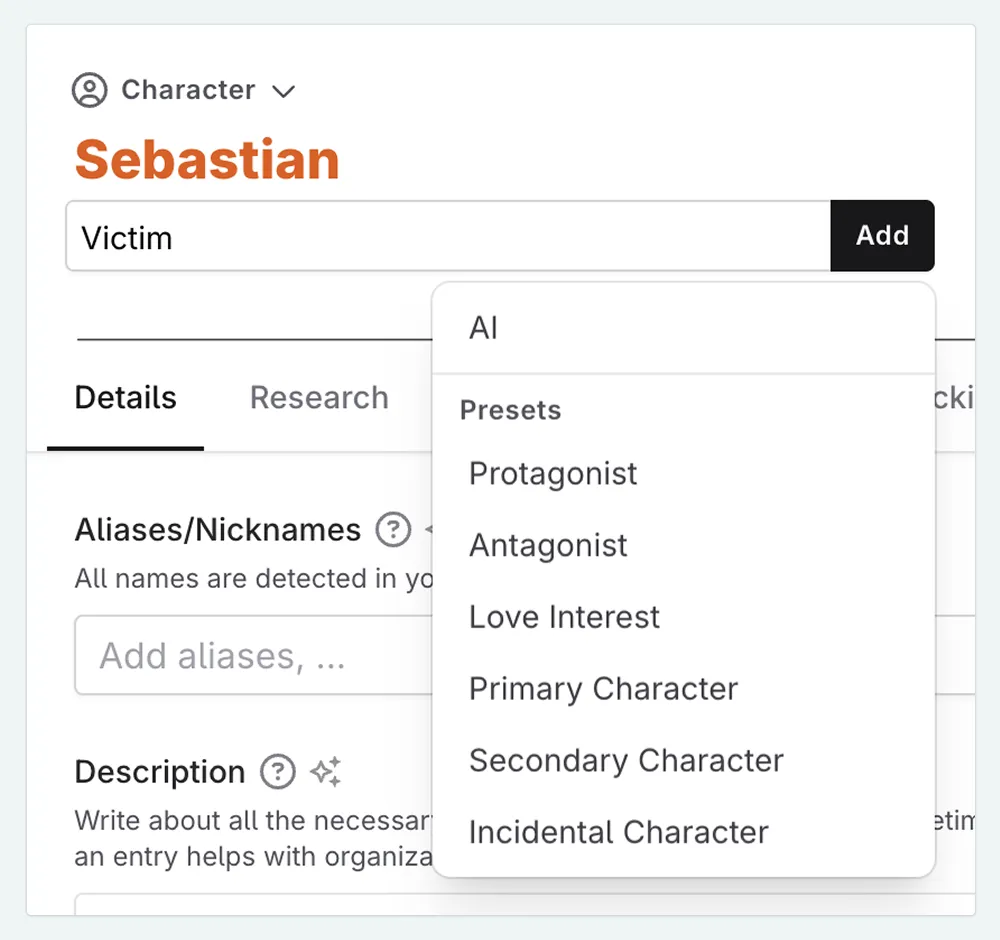
Tagging Your Entries
Colors are great for high-level categories, but what if you need more detail, or want a visual reminder of why you’ve assigned a color to an entry? That’s where tags come in. Tags let you add specific labels to your entries, allowing you to quickly differentiate between things like a ‘clue’ and a ‘household item,’ or a ‘town’ and a ‘shop.’
Open a Codex entry
Find the Tags section at the top, under the title
Start typing to create a new tag, or select one from the list of tags you’ve already used. Novelcrafter also includes default tags for inspiration, which differ per Codex type.
Tags are for your eyes only (they don’t influence the AI). When you mention a tagged entry in your manuscript, the tag appears on the preview card. This provides instant context about what you’re looking at, right where you’re writing.
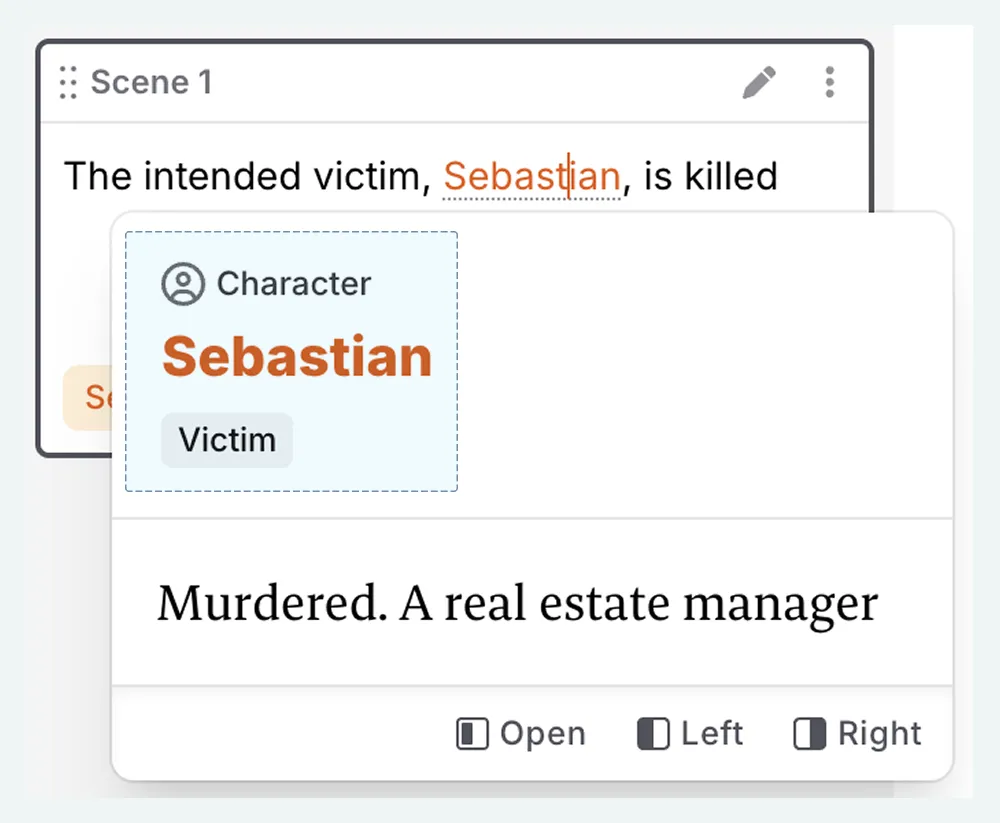
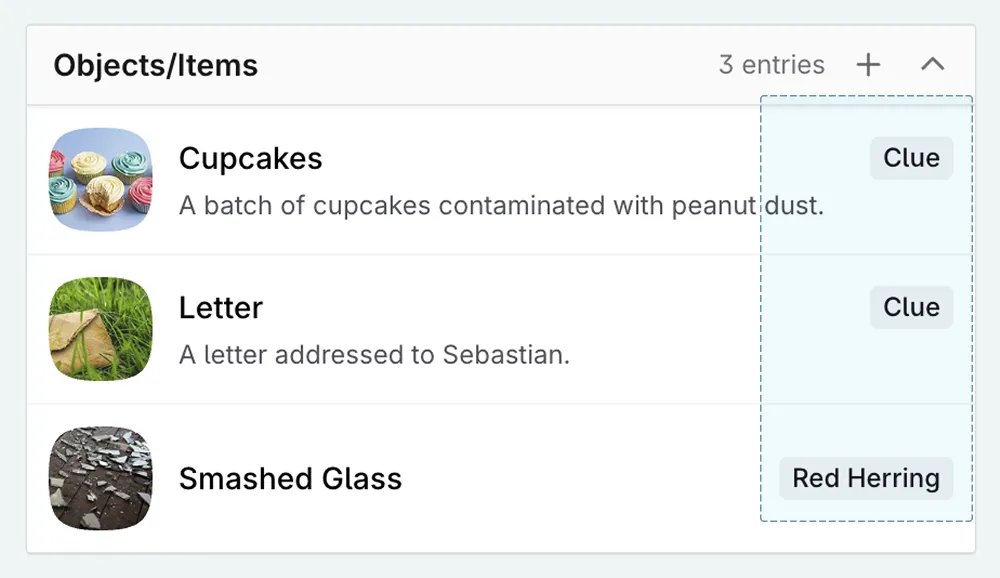
I use tags to track the state of things. For my mystery, I’ll tag locations where clues are found, or objects as red herrings (false clues).
Customizing the Codex’s appearance
As your Codex increases in size, you might want to see more entries at a glance. Novelcrafter has three views available to you: default, compact, or slim. To change the size of Codex entries in the side panel…
- Click the ⚙ (cog) icon at the top of the Codex sidebar
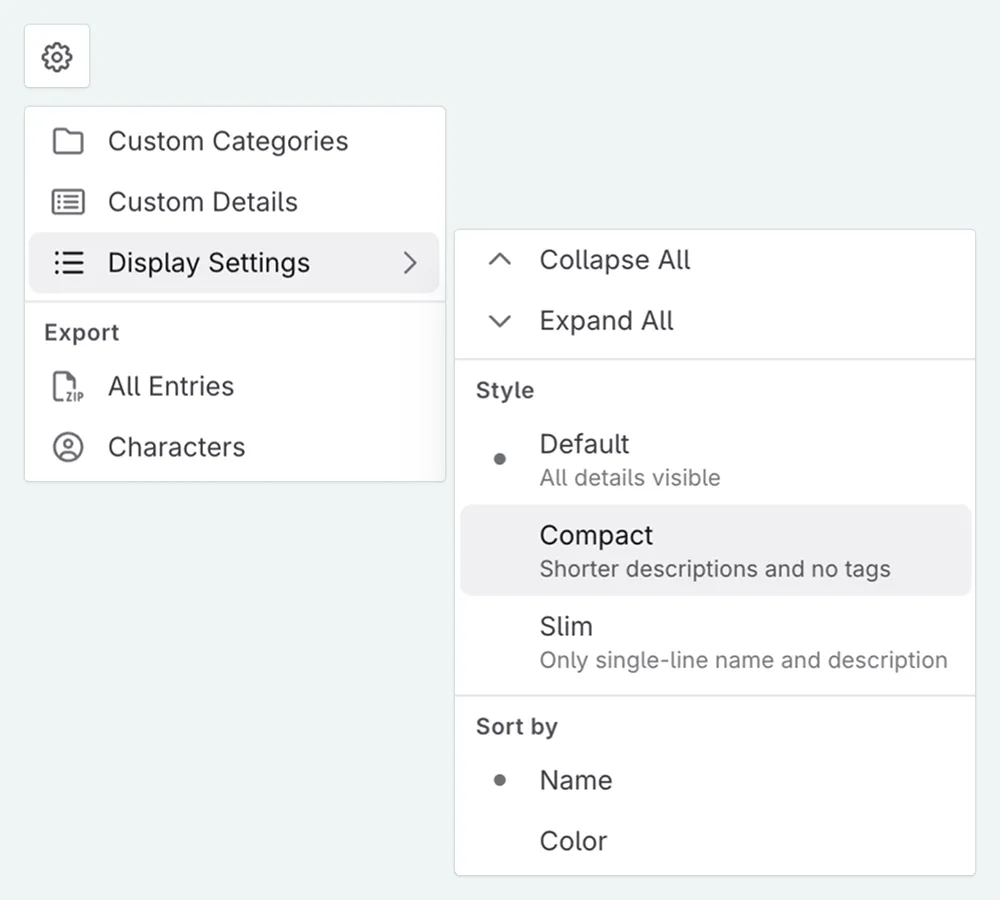
- Select Display Settings
- Choose between the Default, Compact, or Slim styles to see what works best for you.
Recap
By using images, colors, and tags, you can organize your Codex into a visual guide for your story. This helps keep your writing focused and makes your information easy to find.
Now that your Codex is visually organized on the outside, let’s look at structuring the details within each entry using Codex details to ensure all your character and world-building information is just as tidy.
This lesson was taught by:
Kate
Based in the UK, Kate has been writing since she was young, driven by a burning need to get the vivid tales in her head down on paper… or the computer screen.