
- Level:
- Novice
- Lessons:
- 18 Lessons
Writing Your First Prose
Discover how to navigate the Write view and draft your first lines of prose.
- Reading Time
- approx. 4 min
You’ve brainstormed ideas in Snippets, organized your world in the Codex, planned your scenes, and might have chatted with AI to further develop them. But there’s one place we haven’t spent much time yet — the place where your story actually gets written.
In this lesson, we’ll explore the Write interface, learn our way around its layout, and write our first lines of prose.
Key Takeaways
- The Write interface keeps your Codex, scene summaries, and story timeline accessible right alongside your prose.
- Continuous autosave and the Scene Contents History let you write freely without worrying about losing your work.
- You can easily add new scenes and chapters, or switch to Focus Mode, without leaving the manuscript.
Entering the Manuscript
There are two ways to get into the Write interface:
- Click Write in the top bar. This opens the manuscript and shows you the last scene you were working on.
- Alternatively, from the Plan interface, click the pen icon next to any scene, chapter, or act. This takes you directly to that specific scene, chapter, or act.
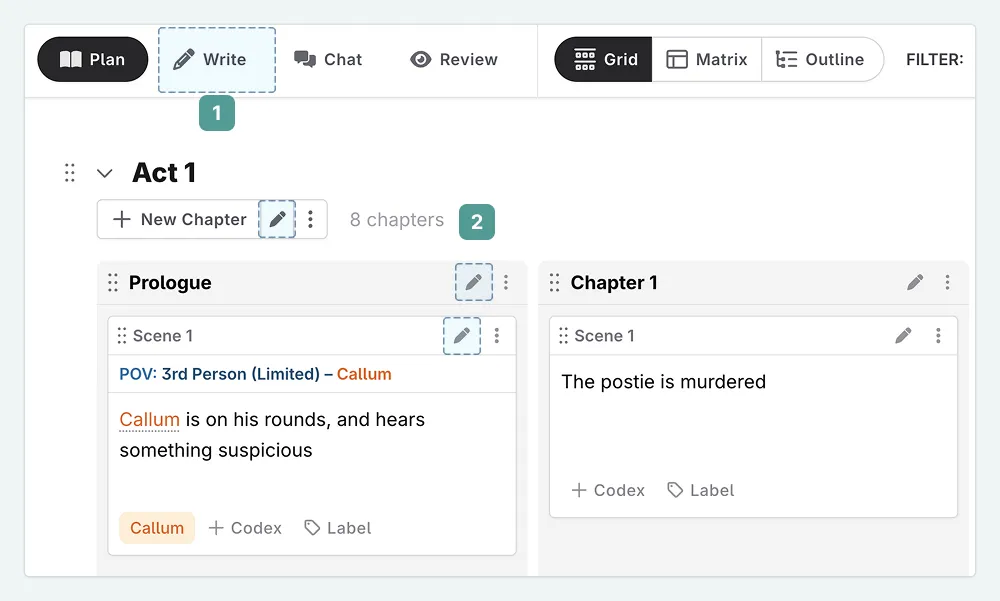
The Layout
The manuscript is designed to be clean and distraction-free, but there are a few key areas to know about. Here is a quick tour.
- Chapter selection and overview. At the top, you can track your current chapter, switch to different chapters, and view the total word count for your current scene, chapter, or act.
- Scene details. On the right-hand side of each scene, you’ll find the scene summary, word count, point of view, and the actions menu (three dots). This is the same information you entered back in the Plan interface — it follows you here, for quick reference.
- The writing area. This central space is where you actually type your prose.
- Story timeline. The thin vertical bar on the far right. Each scene is represented by a marker, and clicking one jumps you straight to that scene. While scrolling works well for a few scenes, the timeline lets you instantly jump from the beginning of Act 1 to a specific scene in Act 3.
You might notice some familiar elements. The right-hand sidebar shows the POV character you set in our lesson on POV characters and the scene summary you wrote in our lesson on adding scenes. Everything you’ve built so far is right here alongside your writing.
Writing Your First Prose
Let’s write something! Click into the writing area of your first scene. You’ll see a cursor blinking, ready for you to begin.
Try not to overthink it at this stage. Just as we did with the brainstorm snippet we created, the goal is to get words on the page. Now, you are writing your actual story.
For my Cozy Mystery, I’m going to start with one of my first scenes. I have an image in my head of Mia and Sparky in her shop, and I want to capture that moment. So I’ll start with a moment between the two that many dog owners will recognise.
I’m not aiming for perfection here. I just want to set the scene and get a feel for Mia’s voice. I can always come back and revise later.
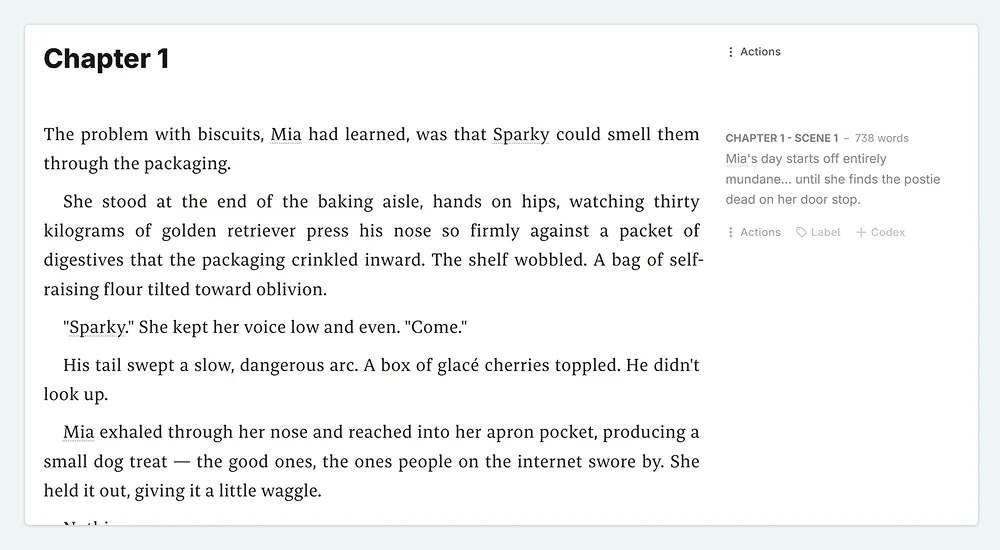
As you write, you might notice that any character or location names that match your Codex entries will get a thin underline. Click on a mention to see a quick preview of that entry. This is handy for checking a character’s details without leaving your manuscript.
What If I Make a Mistake?
With autosave working in the background, you might wonder: what happens if I accidentally delete a paragraph, or rewrite something and want the old version back?
Novelcrafter keeps a history of your changes. Each scene’s content, summary, and even your Codex descriptions and Snippet content have their own revision history. You can open it to browse earlier versions and restore one if needed.
- In the scene details area, open the Actions Menu (three dots) for the scene you want to check.
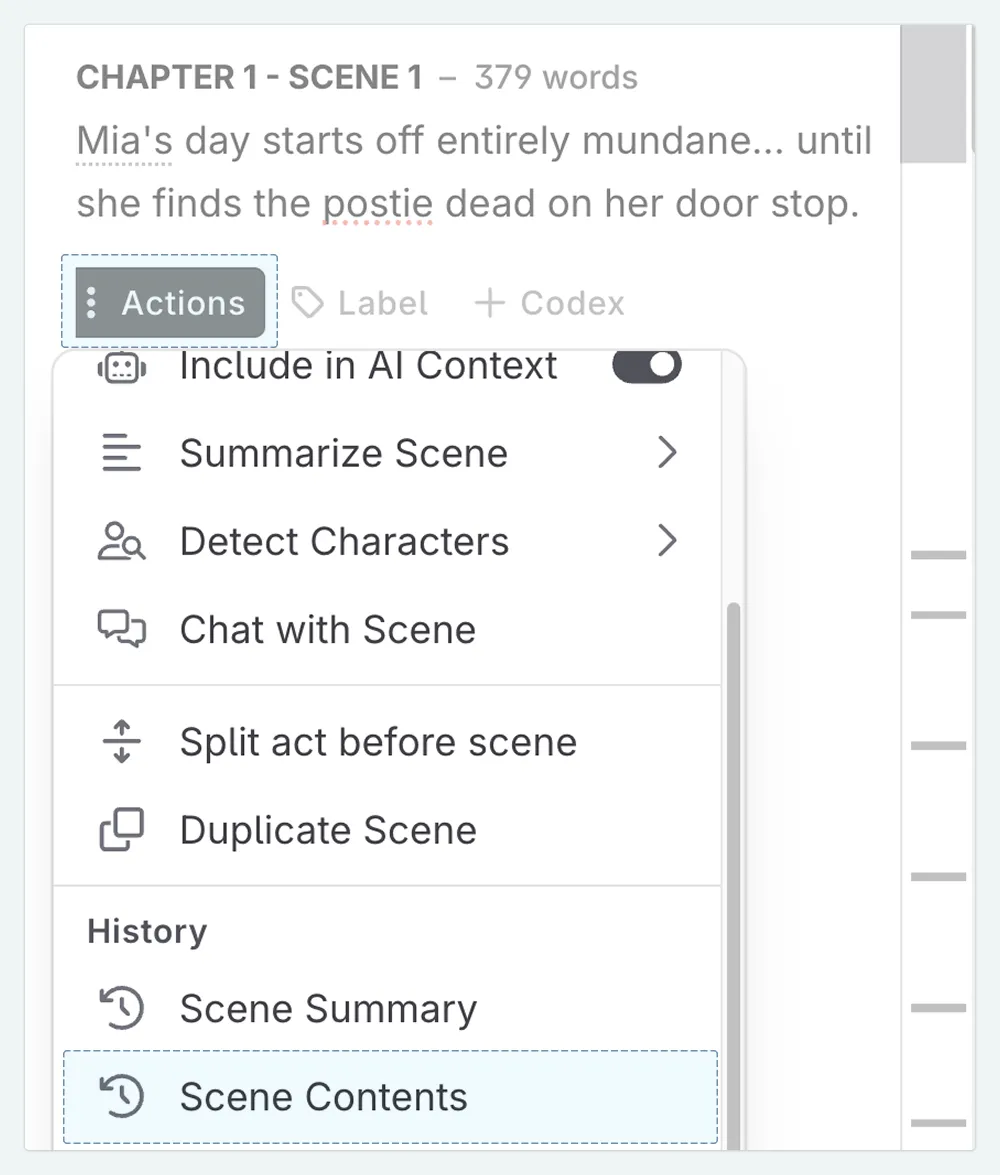
- Select History -> Scene Contents .
- A window will show all saved versions, with timestamps. Click on any version to preview it, and use Restore Version to bring it back.
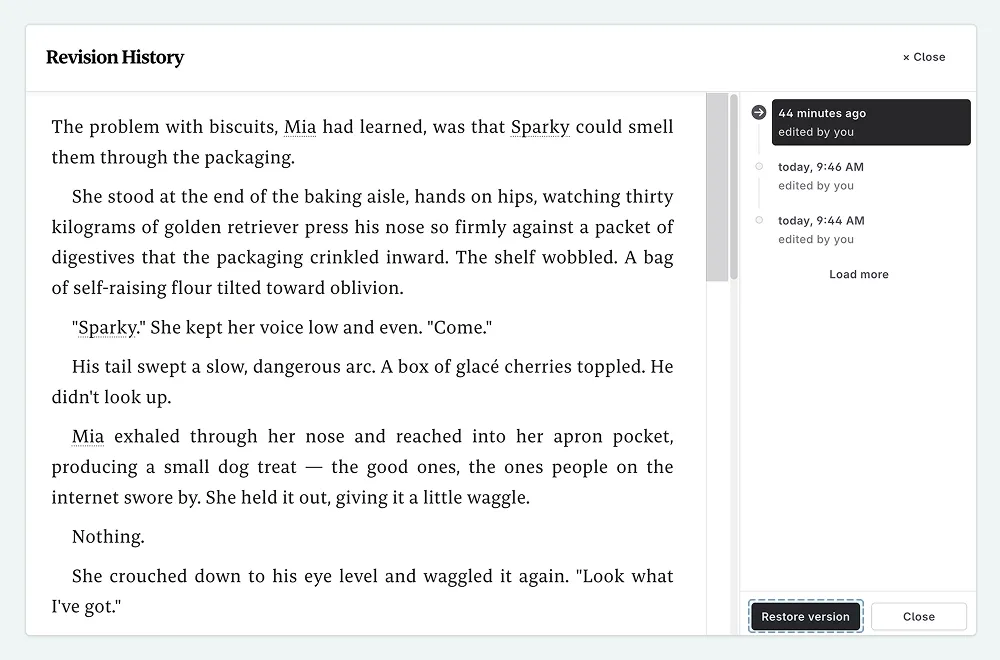
The history log is a safety net, but it’s good to know it’s there, especially as you start making bigger changes to your scenes.
Using Your Scene Summary as a Guide
One of the benefits of the planning you did in our lesson on adding scenes is that your scene summaries are now visible right beside your writing. You can glance at the scene details panel to remind yourself what this scene is about, then write towards that goal.
Your summary acts as a compass. It points you in the right direction while leaving plenty of room to explore along the way. If your writing takes an unexpected turn, that’s part of the creative process! You can always update the summary later to match what you actually wrote.
Adding New Scenes and Chapters
In a previous lesson, we created scenes and chapters from the Plan interface. But what if you’re in the middle of writing and realize you need a new scene or chapter? You don’t have to leave the manuscript to create one.
At the bottom of each chapter, you’ll see buttons to add new content:
- + New Scene adds a new scene to the end of the current chapter. This is useful when a moment in your story calls for a break — maybe the point of view shifts, or time passes, and you want a clear divider within the same chapter.
- + New Chapter adds a new chapter (with an empty scene inside it) to the end of the current act. Use this when you’re ready to move on to a new chapter entirely.
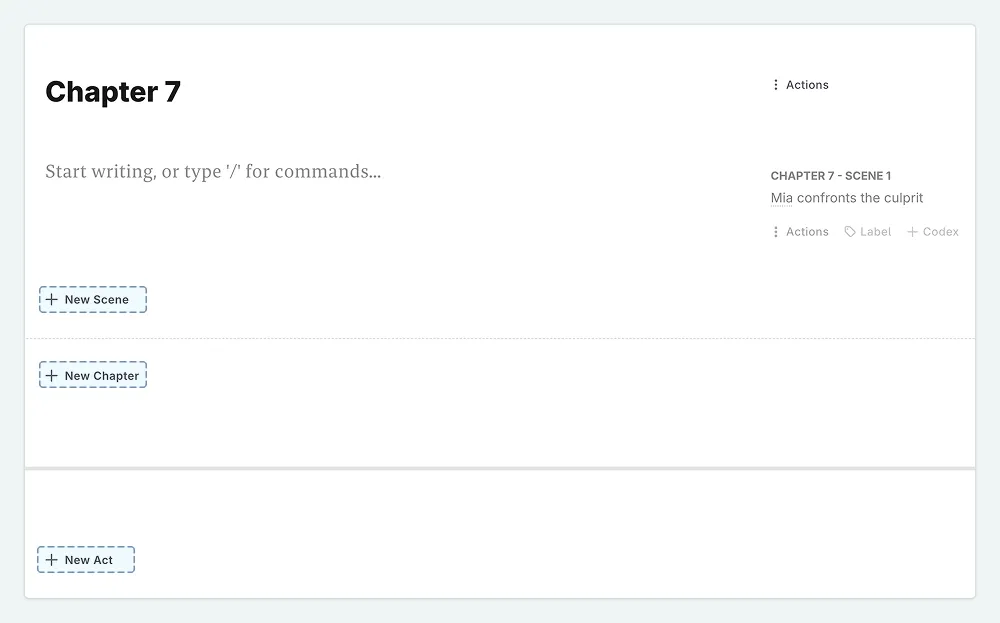
These new scenes and chapters will also appear in the Plan interface, so your outline stays in sync with your manuscript.
I often create new scenes while writing. When I’m in the flow and finish a scene, I’ll click + New Scene and keep going rather than switching to Plan. I’ll tidy up the order later. Don’t let organization slow down your momentum!
Closing Thoughts
You’ve now seen where your story lives in Novelcrafter. In the next lesson, we’ll look at how AI can help you write prose using scene beats.
This lesson was taught by:
Kate
Based in the UK, Kate has been writing since she was young, driven by a burning need to get the vivid tales in her head down on paper… or the computer screen.