Examples of Prompt Inputs
See how prompt inputs are set up in Novelcrafter as inspiration for your own.
Prompt inputs can be as simple or as complicated as you would like. In this documentation we will show three common ways that you might use prompt inputs in your own prompt creation.
1. Single word/phrase replacement
Use this for when you want to make small but significant tweaks in the prompt, for instance setting a genre, or wordcount. In these instances, the setup is fairly straightforward. Say if we wanted to set a genre in our workshop chat prompt.
Go to the Instructions tab.
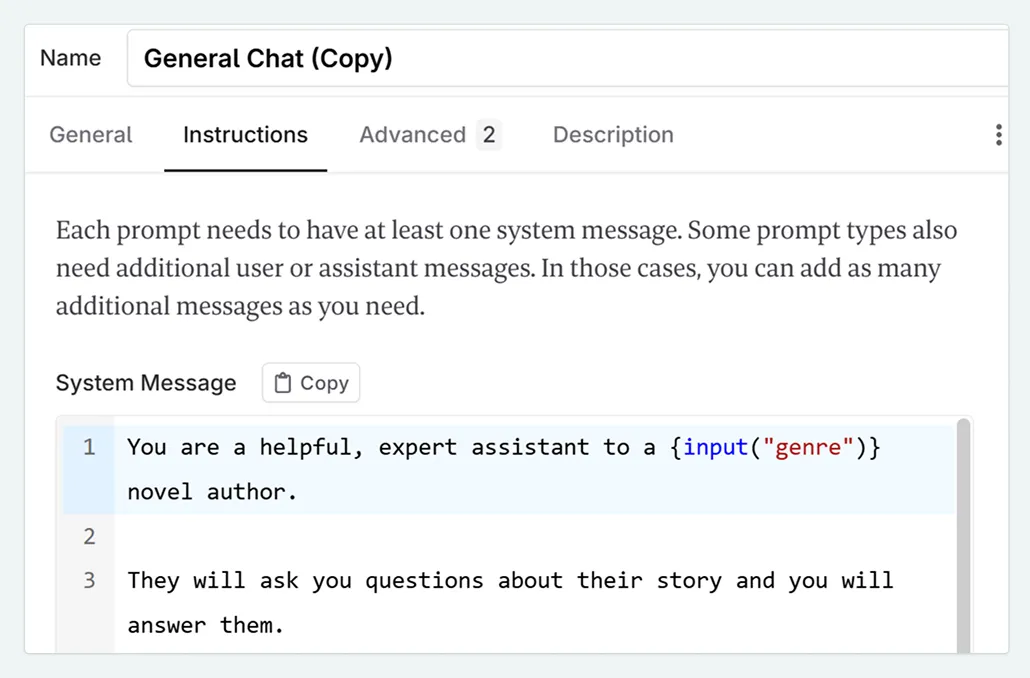
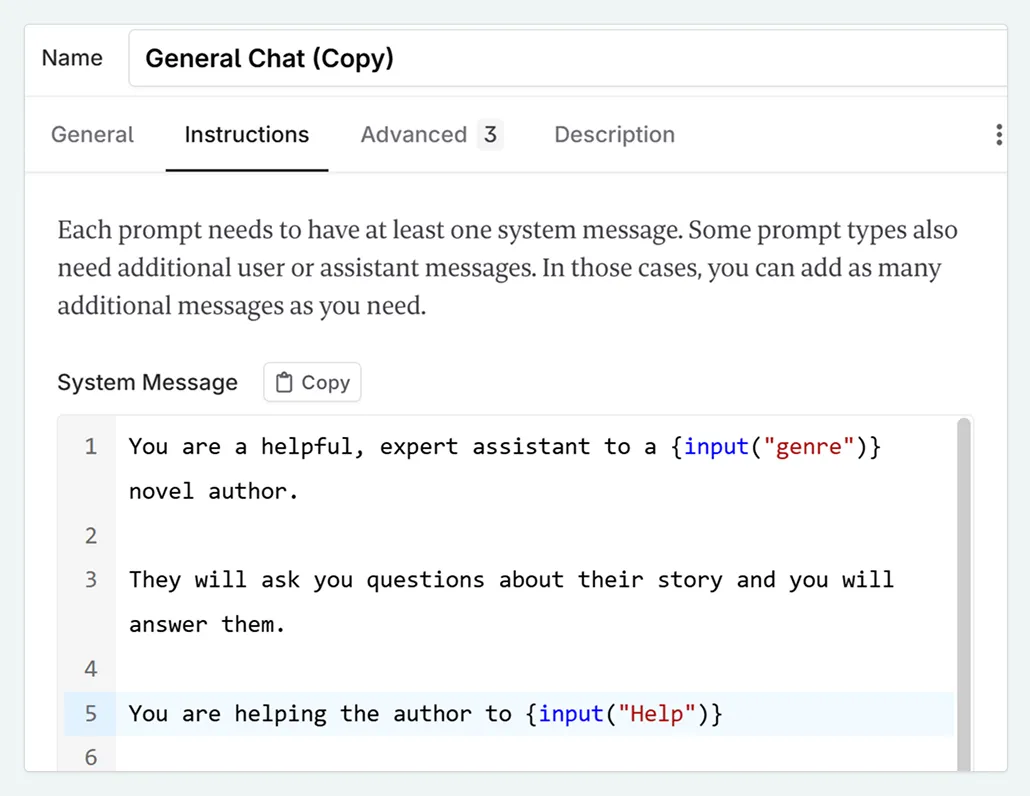
Make the following edit, from:
ExampleYou are a helpful, expert assistant to a novel author. They will ask you questions about their story and you will answer them.
to
ExampleYou are a helpful, expert assistant to a {input(“genre”)} novel author. They will ask you questions about their story and you will answer them.
This is made up of the title of your input (“genre”), and what it is (an input). This is similar to how components work in Novelcrafter.
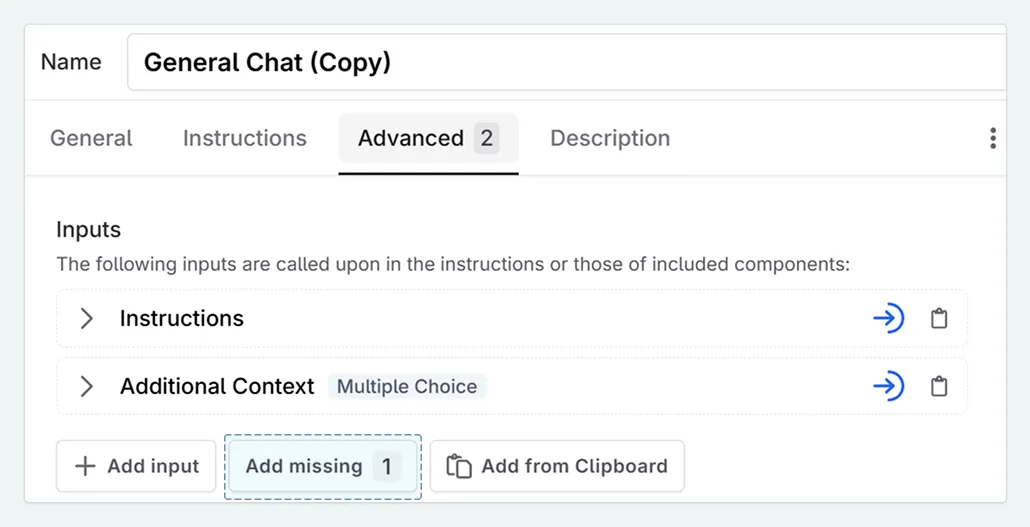
Now move to the Advanced tab. Click Add missing to add your input to the list.
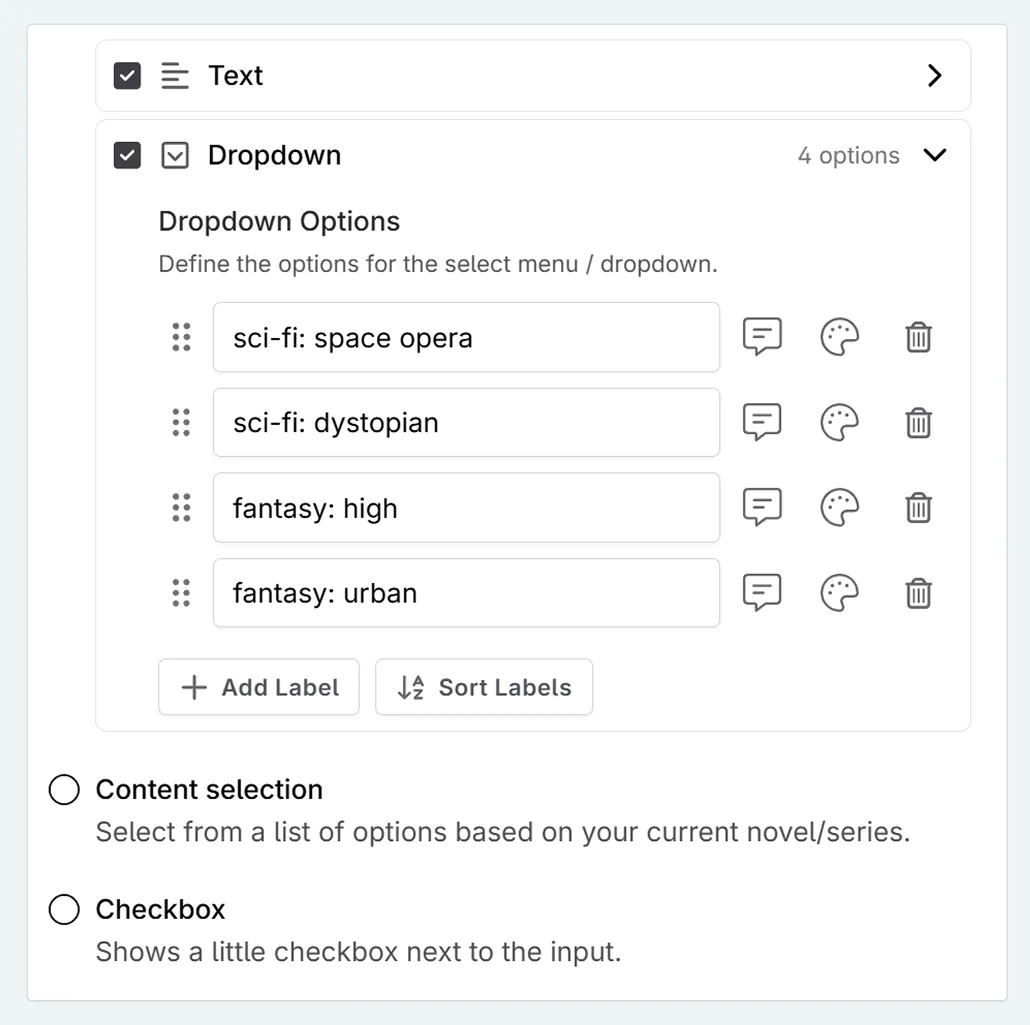
Configure your input. Under allowed content, select Custom Content . For genre, allow both the text and dropdown options.
Leave the text field blank - this is for if the genre you want to use is not present in the dropdown.
In the dropdown section, add the genres that you wish to add. For simplicity, stay with the genres that you are most likely to write in.
2. Options based on selection
For if you want to have your selection give options for the user (i.e. the input you select then feeds additional information to the AI). Use cases for this include types of rewriting, and personalities for the AI.This example will expand on the above prompt, and add in a section that gives extra information
Go to the Instructions tab.
Add your prompt input to the instructions.
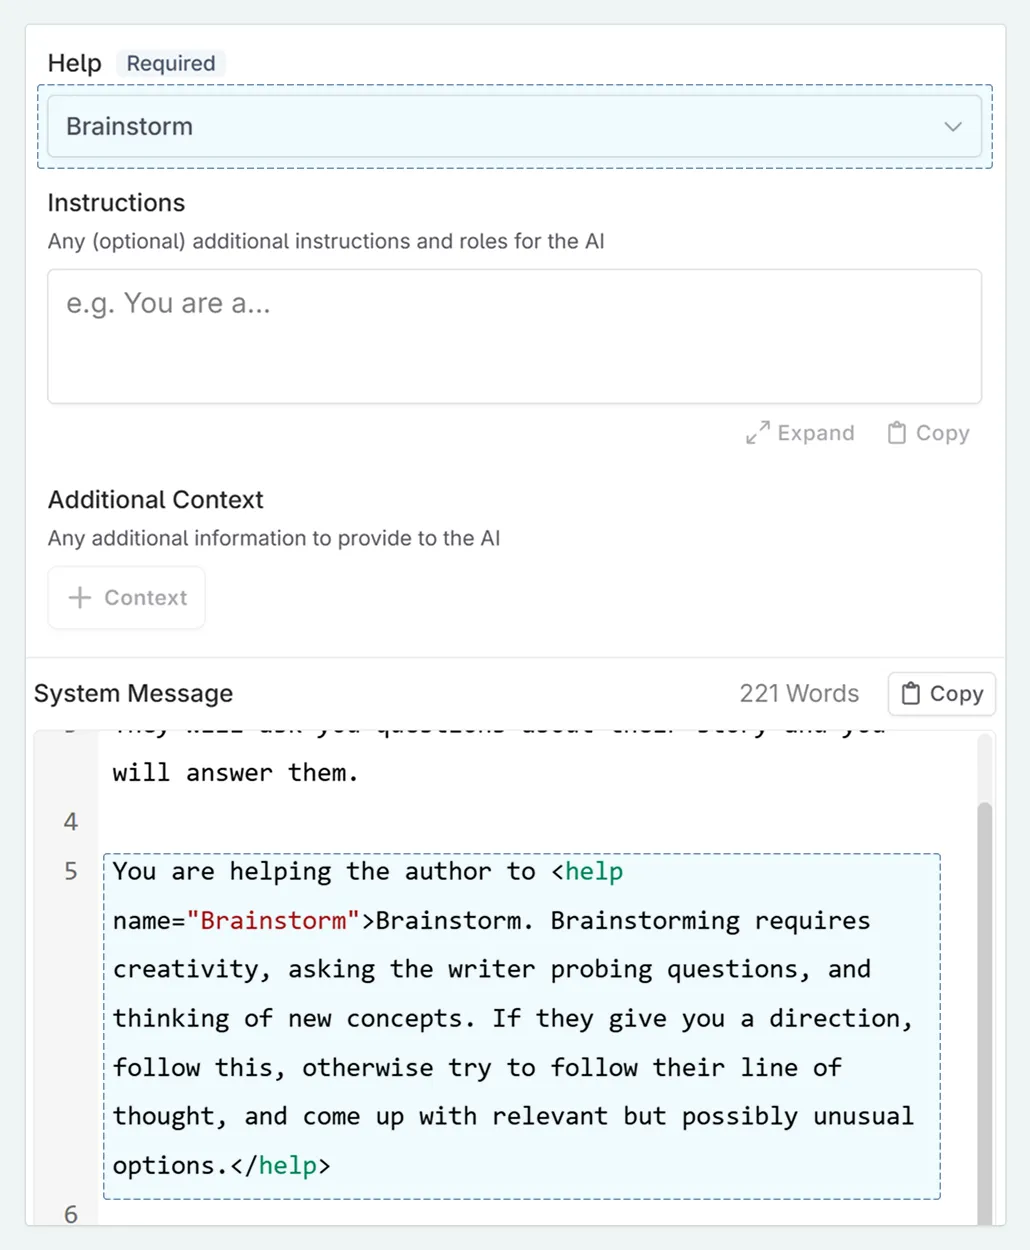
ExampleYou are helping the author to {input(“Help”)}
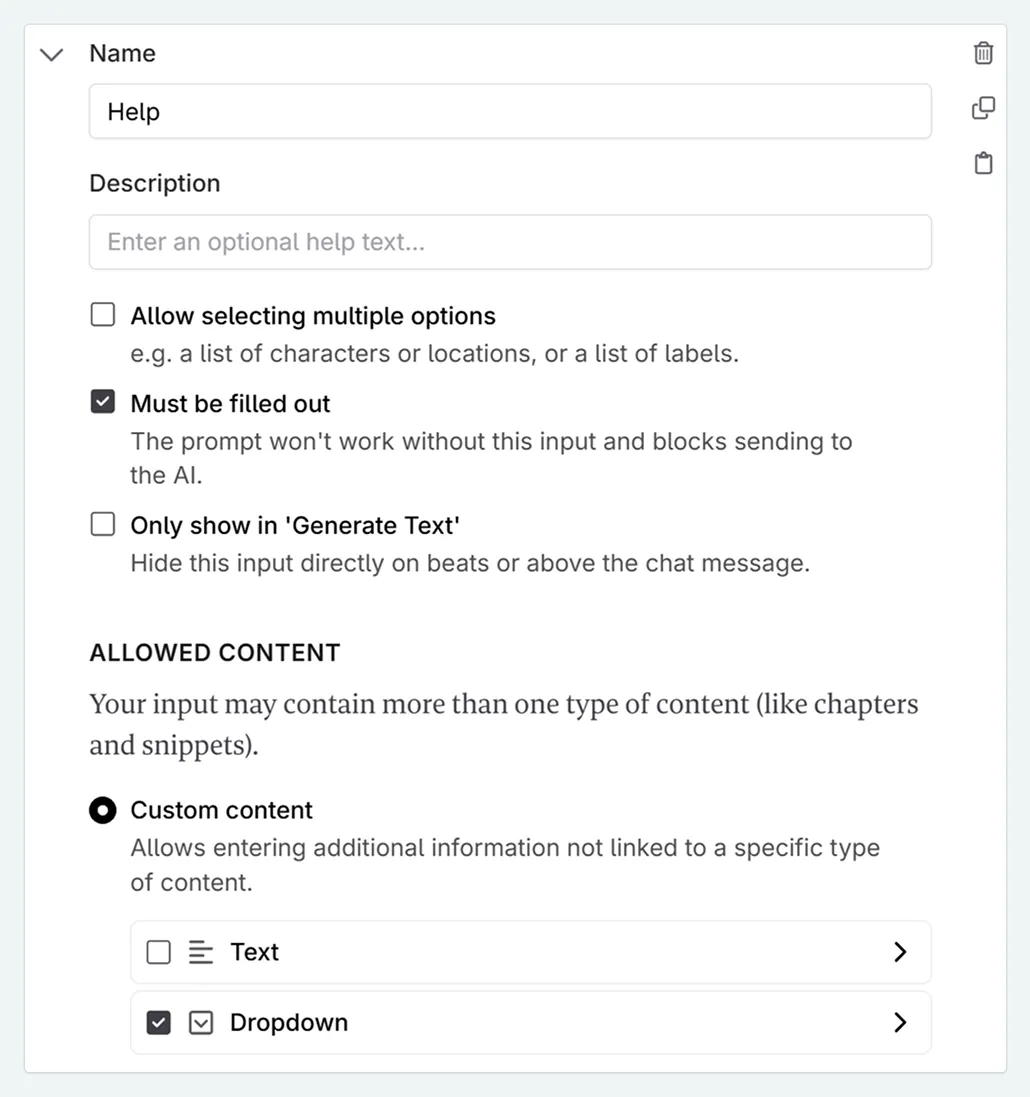
Now move to the Advanced tab. Click Add missing to add your input to the list.
Configure your input. For the above example, choose ‘Must be filled out’. Under allowed content, select Custom Content , and the dropdown option.
In the dropdown section, click Add Label and add the chat help modes that you wish to add. In this example we will add:
- Brainstorm
- Plot
- Analyze
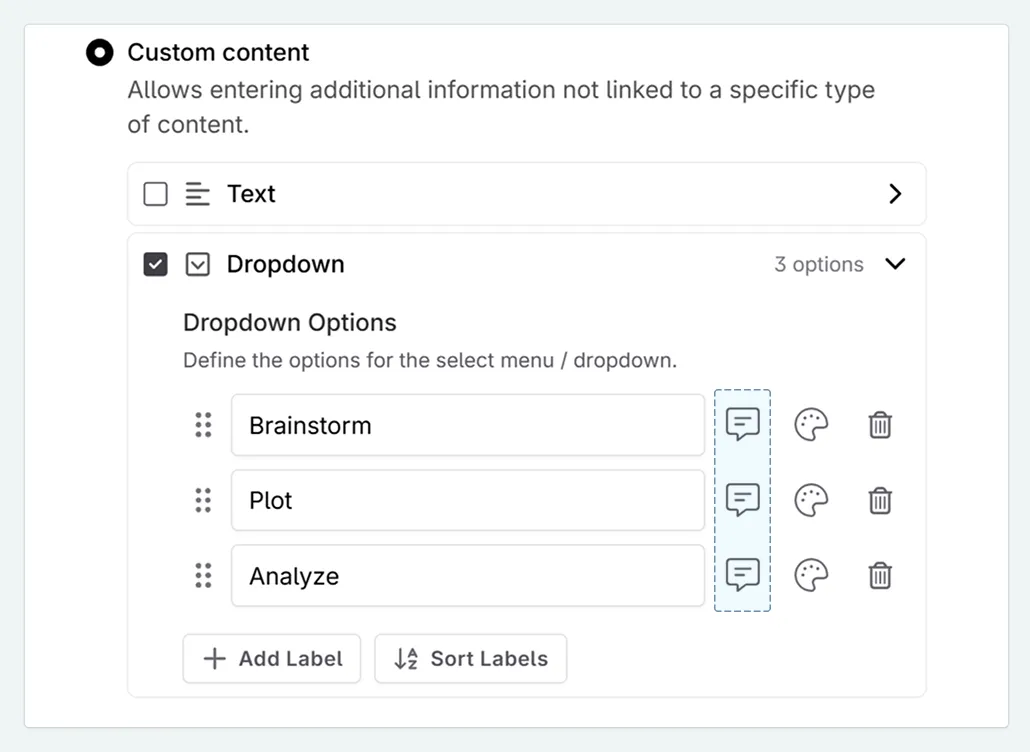
For your first option, now select the speech bubble next to the option input. A modal will appear.
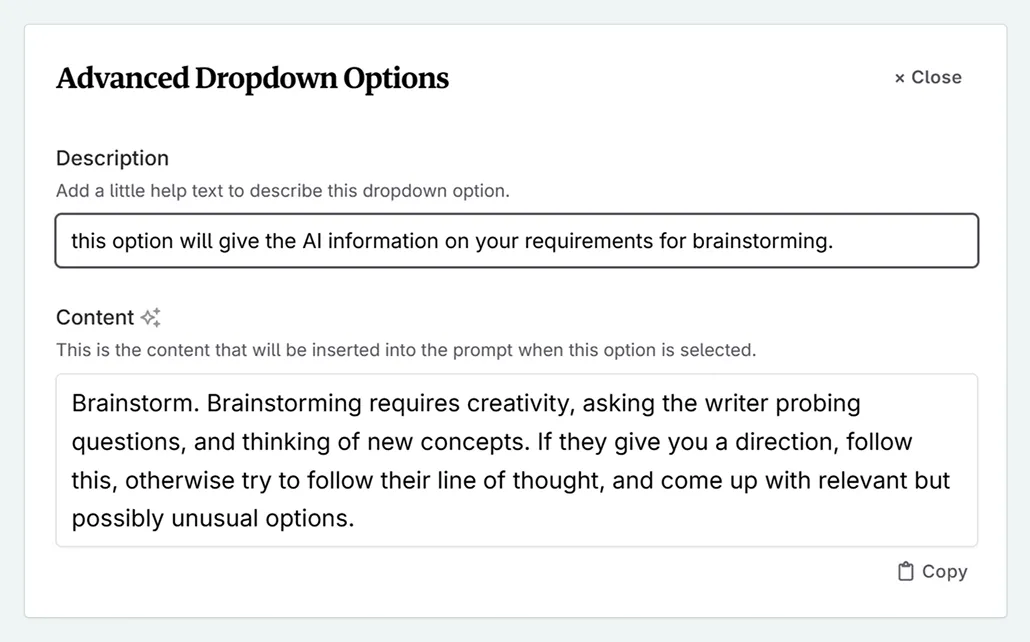
Add any help text for the users, and then enter your content. This may look like:
ExampleBrainstorm. Brainstorming requires creativity, asking the writer probing questions, and thinking of new concepts. If they give you a direction, follow this, otherwise try to follow their line of thought, and come up with relevant but possibly unusual options.
 Then click close. It will automatically save. You will now see that the speech bubble is highlighted.
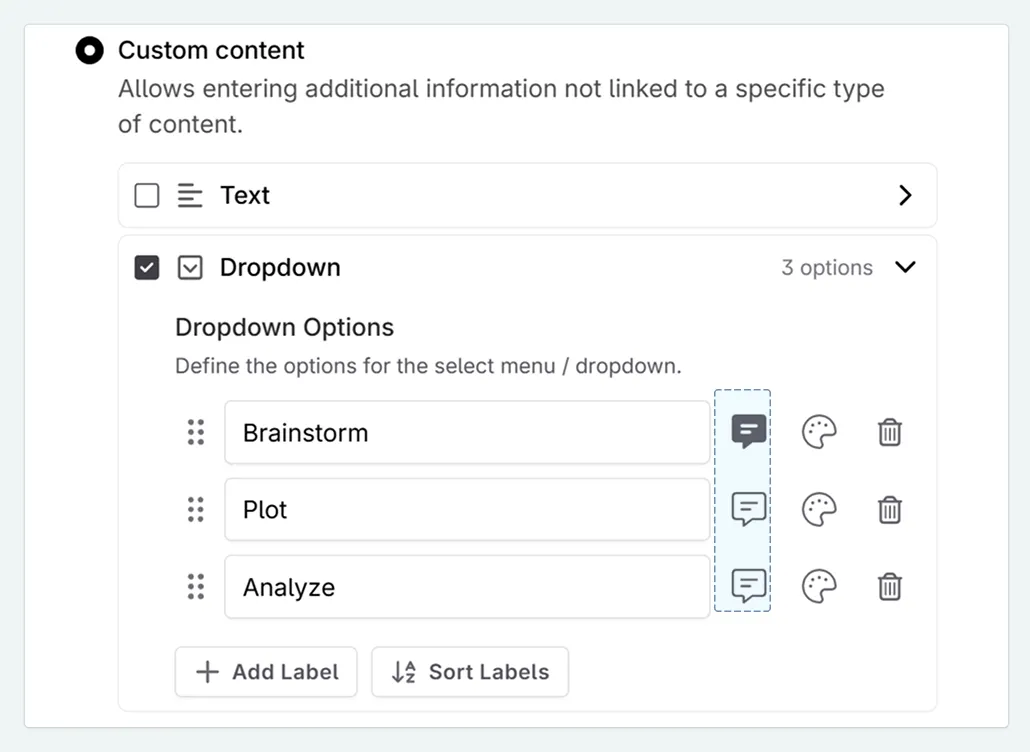
Scroll down to the preview, and see how the text changes depending on which help option you choose.